
If you’ve been reading up on the many lessons relating to scales on this site, you will most likely know the importance of learning scales in five positions (known as the CAGED system).
By learning scales in five positions, we cover the entire fretboard, which allows us to play any given scale no matter what position we are in.
But what about arpeggios? Do they work in the same way?
The short answer is yes.
You may have been told that arpeggios don’t really suit position playing like scales do, because the intervals are inherently large and difficult to manage in the one position. Therefor it is better to not be stuck in any one position when playing an arpeggio. This is partly true. The intervals involved in playing arpeggios generally are large and often the fingering can be awkward when staying in one position. However, the five CAGED positions still provides a way of systematically covering the entire fretboard when learning arpeggios and is therefor a great approach.
5 Positions Of The Dominant 7 Arpeggio
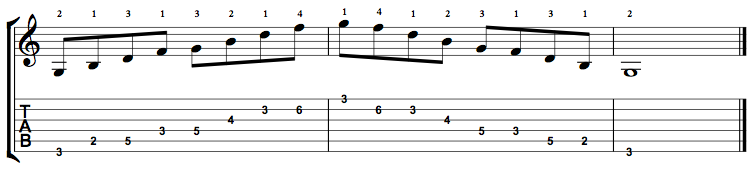
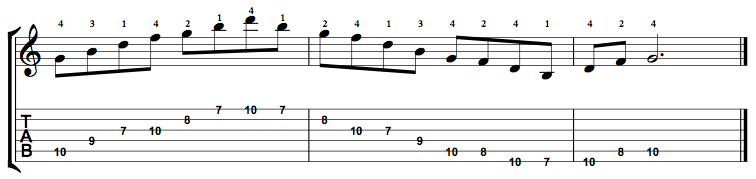
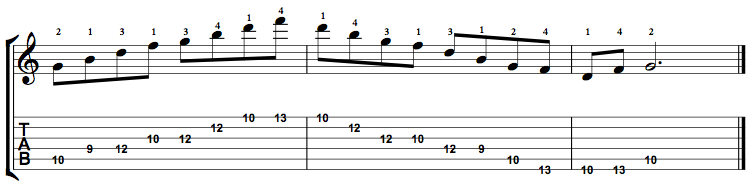
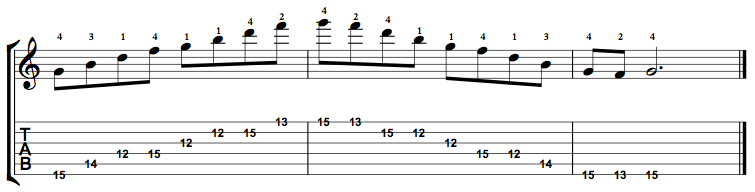
Let’s look at an example arpeggio – the dominant 7 arpeggio. If you want to read more about the dominant 7 arpeggio itself, click here. For the sake of this lesson, the arpeggio itself is not important. What is important is understanding that it can be played in five positions. Here they are:

Let’s pick a key and play through the five dominant 7 arpeggio positions. We will use the G dominant 7 arpeggio for this example.
There are three things that you should already know in order to interpret the above diagrams and use them:
- How to read scale/arpeggio diagrams.
- The CAGED system and the importance of 5 positions.
- How to practise scales/arpeggios by staying in one position.
Five Dominant 7 Arpeggio Positions In G

Ok Great, So What?
So we’ve seen that we can take an arpeggio and play it in five positions, just like with scales. Some of the fingering/technical demands might be a bit tricky, but it still works. But so what? So far, this lesson hasn’t really uncovered anything new. There are already many pages on this site dedicated to playing arpeggios in five positions. The main purpose of this lesson is two-fold – two reiterate that arpeggios and CAGED do work well together, but also that learning arpeggios in five positions is really just a starting point. Once you have learnt an arpeggio in five positions, you can then connect positions together, in a more arpeggio-freindly way.
Connecting Positions
Here are a few examples of different arpeggio positions being connected together. Play them and try to see the different positions as you move from one to another.


So how do you connect positions together? Learning individual positions is relatively straight forward – you learn five positions, master each position on its own and then test yourself with different keys. But how should you connect different positions together?
There are actually no hard and fast rules, and there are infinite options. Basically, at any point of any one position, you can move to another position. Some transitions will feel more natural than others, but there are many possibilities. This is why it’s important to learn the five positions thoroughly, even though with arpeggios, often staying inside one position can seem awkward. Your aim should be to master individual positions, then practise transitioning from one to another, like in the above examples. What you will find is that as your knowledge of individual positions gets better, you will be able to move from one to another with ease, provided that you practise doing so.