In this lesson we’re going to explore how you can take one chord and play it in many different unique ways.
In the previous lesson on triads and inversions, we learned how to form the major and minor triad and play inversions on the first three strings. Here’s a brief summary of that lesson.
The Major Triad
The Major triad is made up of the 1, 3 and 5 of the major scale. For example, the C Major triad contains the following notes:
C – E – G
The minor triad is made up of the 1, b3 and 5 of the major scale. For example, the C minor triad contains the following notes:
C – Eb – G
In the previous lesson, we constructed these basic triads and inversions using the first three strings of the guitar, like this:
Root Position (Maj Triad)
1st Inversion (Maj Triad)
2nd Inversion (Maj Triad)
Root Position (min Triad)
1st Inversion (min Triad)
2nd Inversion (min Triad)
In this lesson, we’re going to take the original concept of playing a basic triad and its inversions, and apply it do different string groupings, to produce 42 unique ways of playing the one major triad.
The concept is pretty simple. In the previous lesson, we produced 3 different voicings of the one triad (root position, 1st inversion, 2nd inversion) by using only the first three strings.
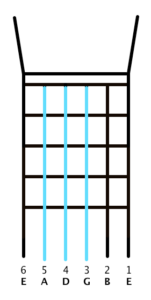
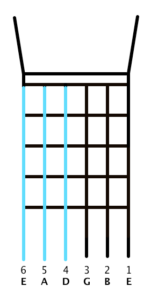
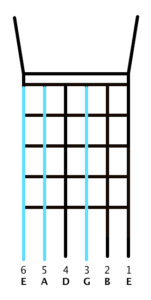
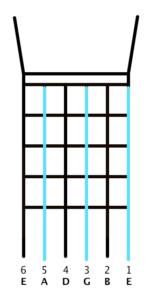
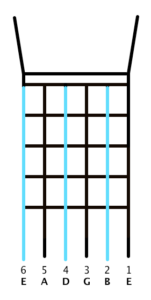
We only used one grouping of three strings, so the next logical step is to use other string groupings to produce even more shapes. For now, let’s stick to string groupings that only include adjacent strings. We will identify each string grouping by the string numbers that are contained within. Here are the four possible string groupings for adjacent strings (using only three strings at a time):
String Grouping(1, 2, 3)
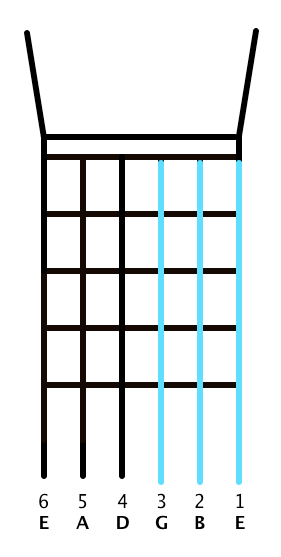
String Grouping(2, 3, 4)
String Grouping(3, 4, 5)
String Grouping(5, 6, 7)
We’ve already looked at triads on for string grouping (1, 2, 3). Let’s now look at the triads for the other string groupings. Remember, we’re using the exact same process as before.
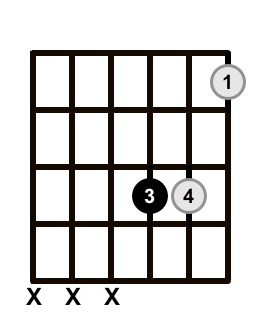
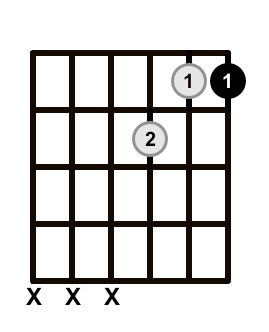
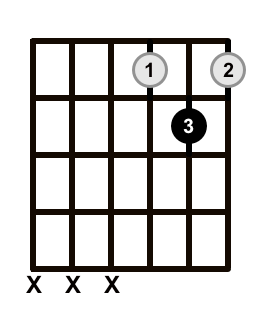
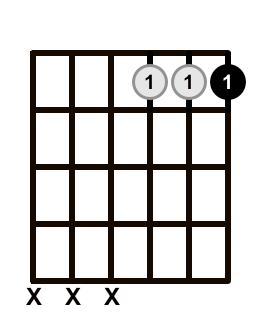
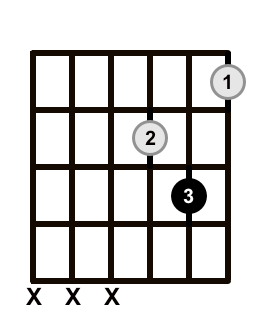
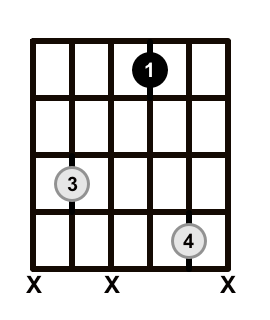
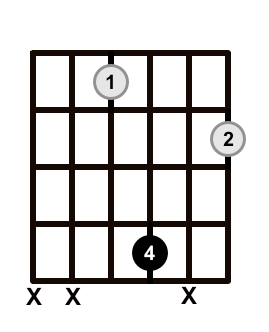
String Grouping (2, 3, 4)
Root Position (Maj Triad)
1st Inversion (Maj Triad)
2nd Inversion (Maj Triad)
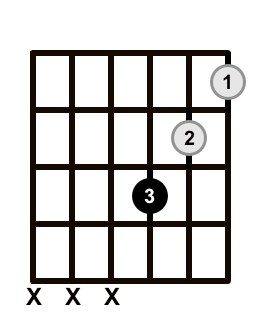
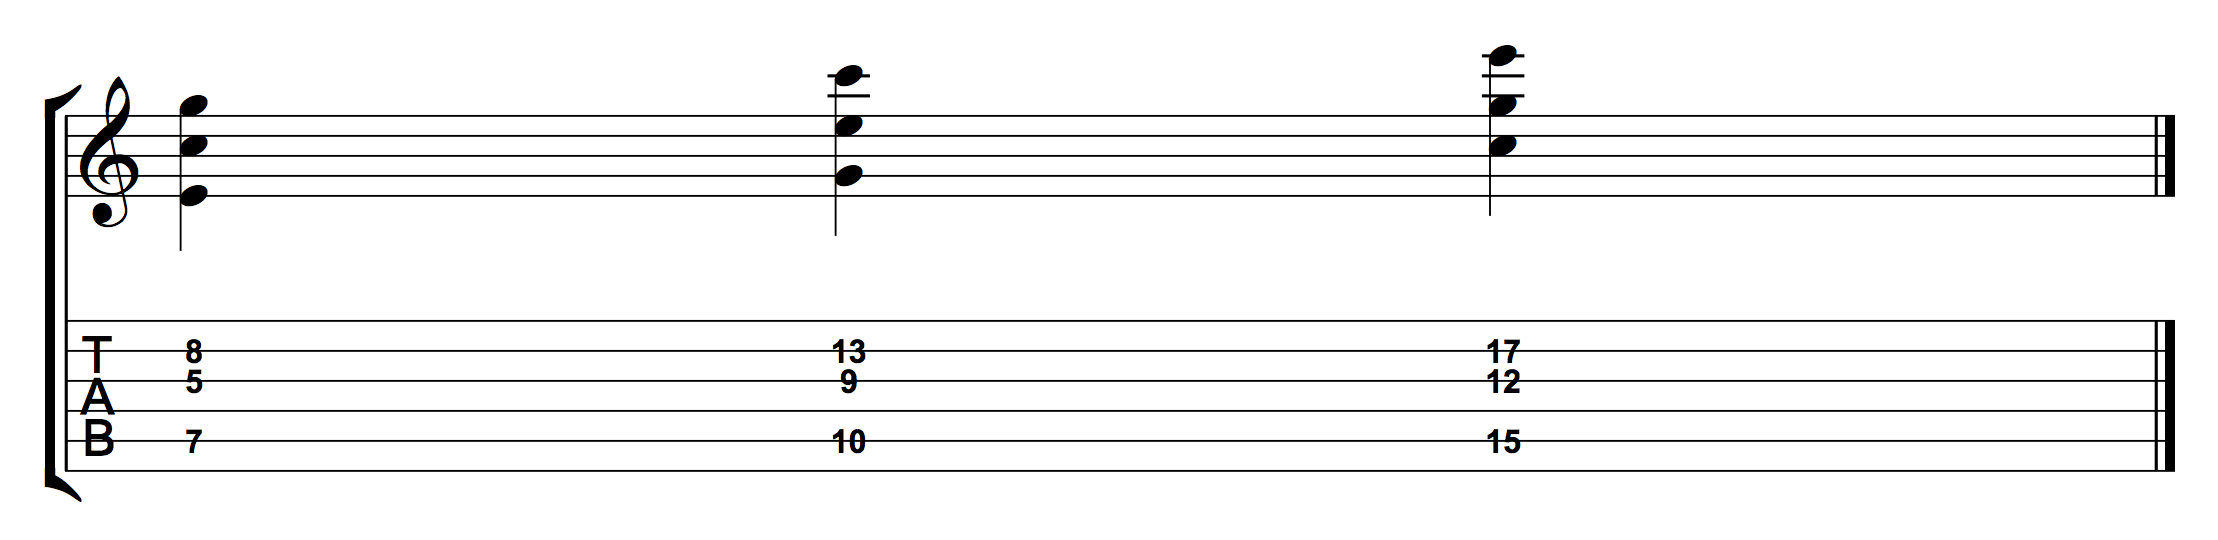
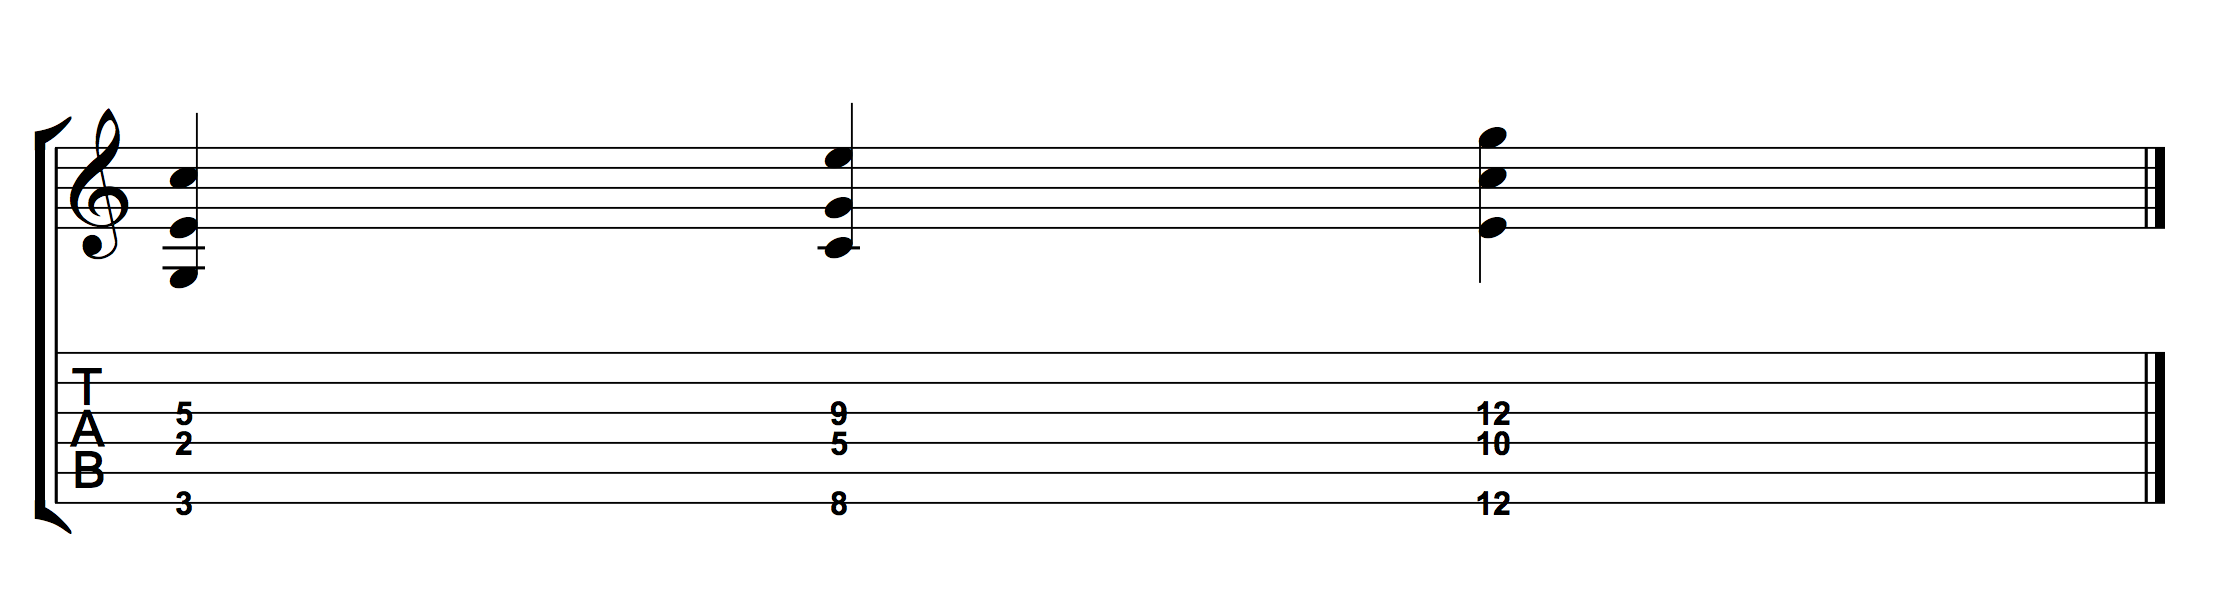
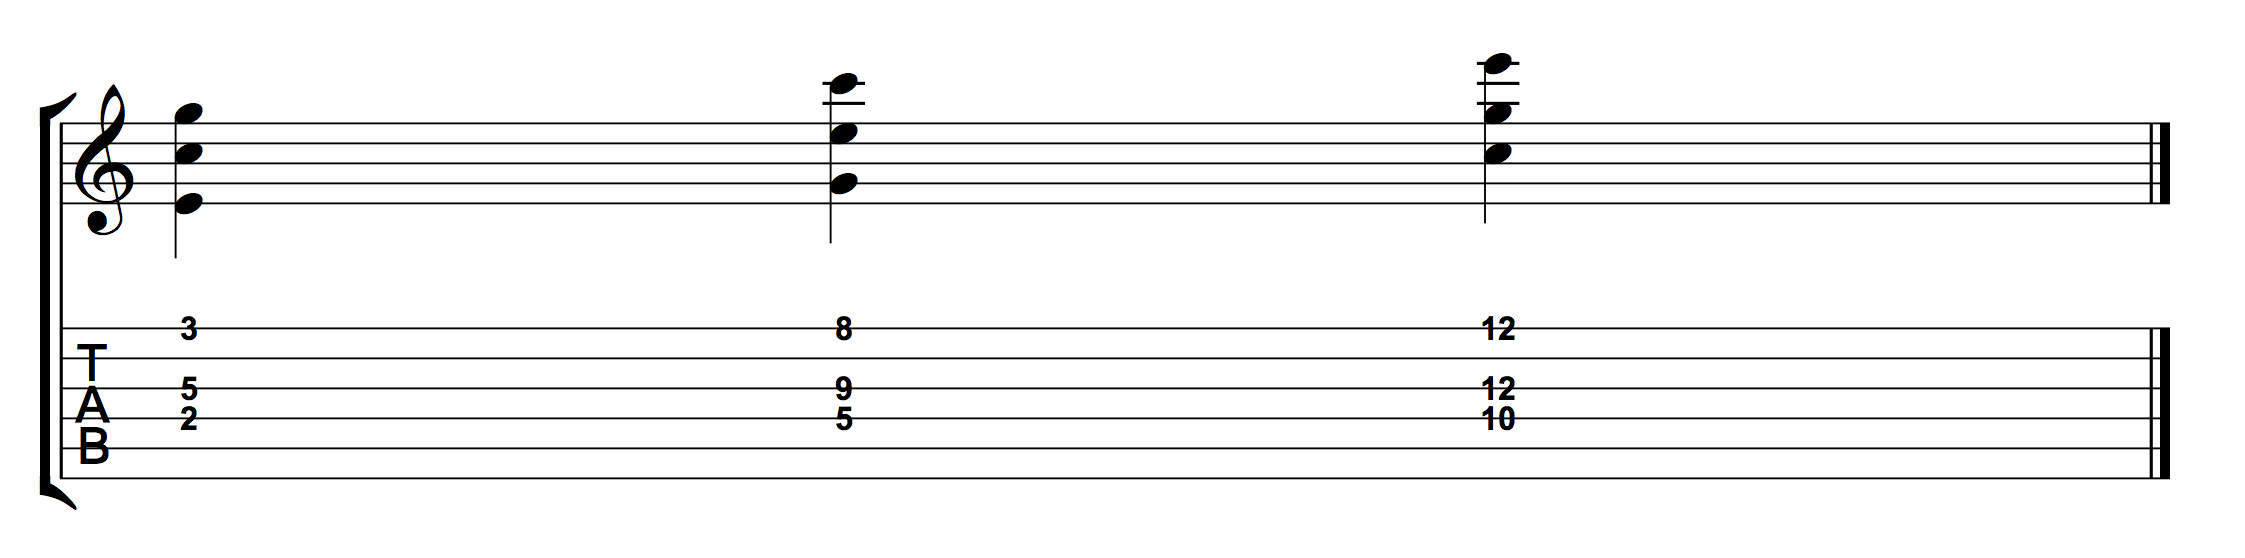
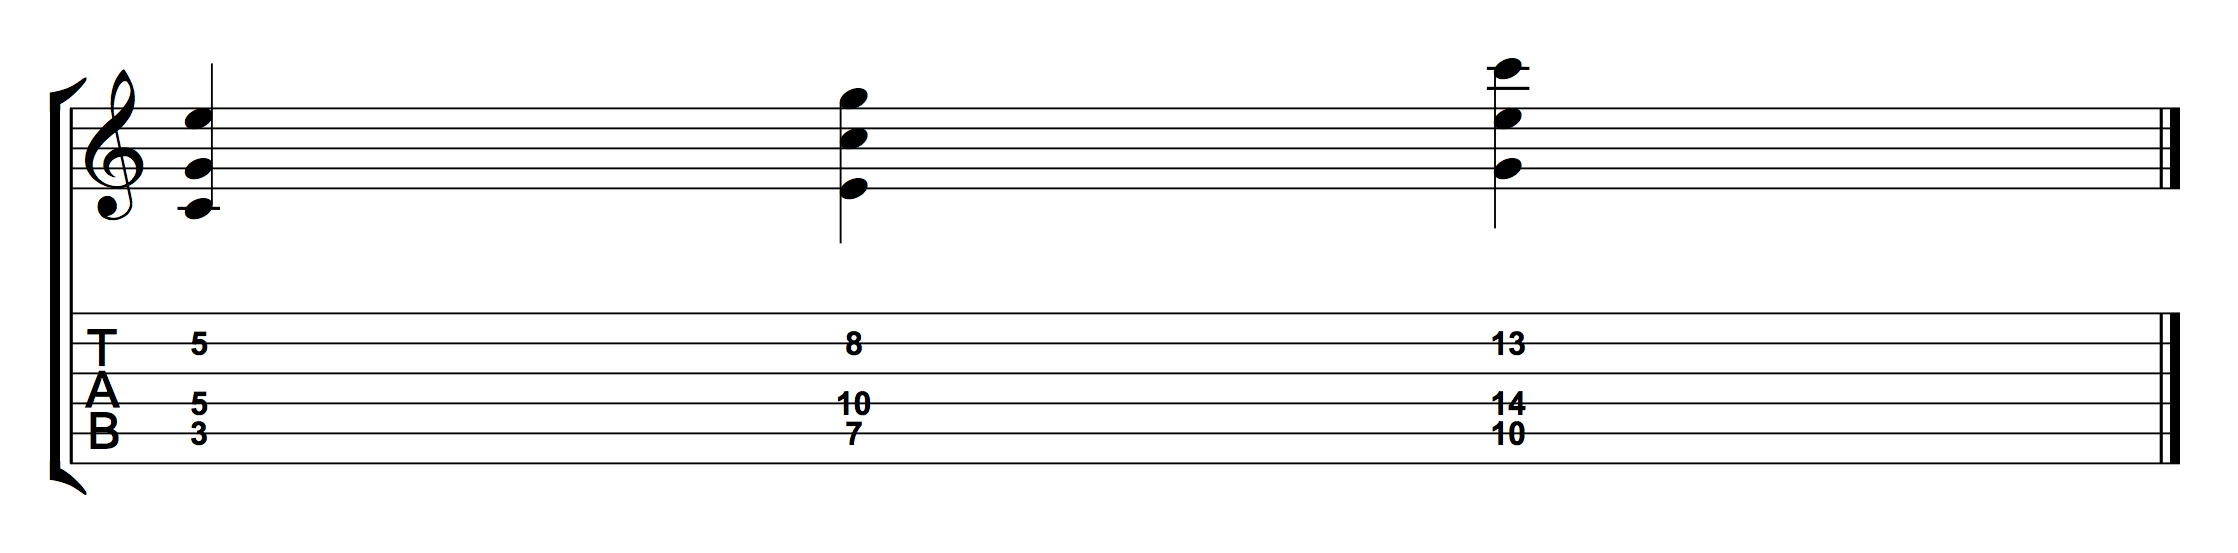
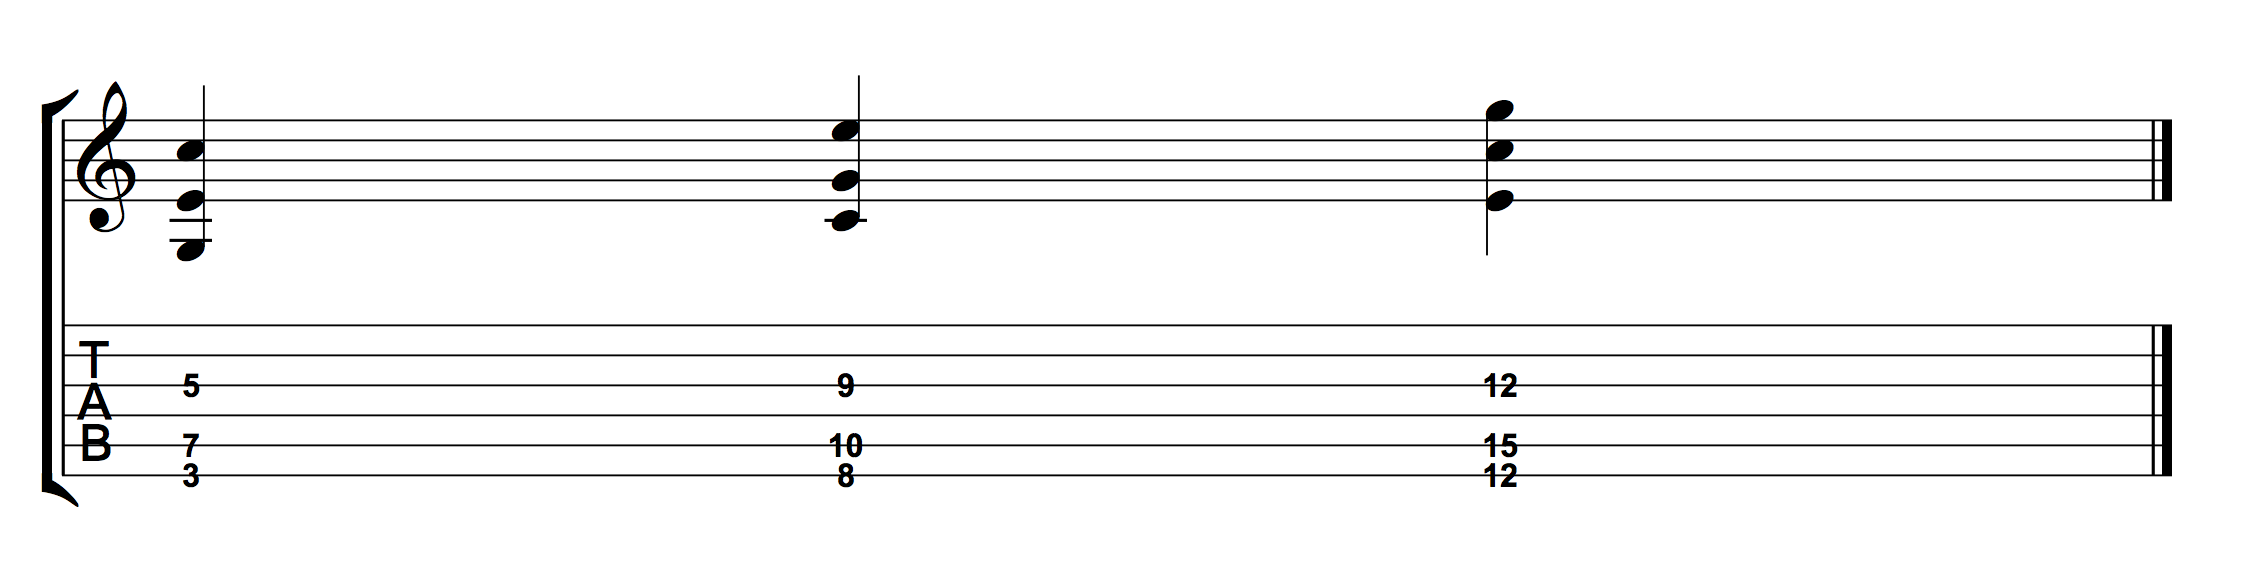
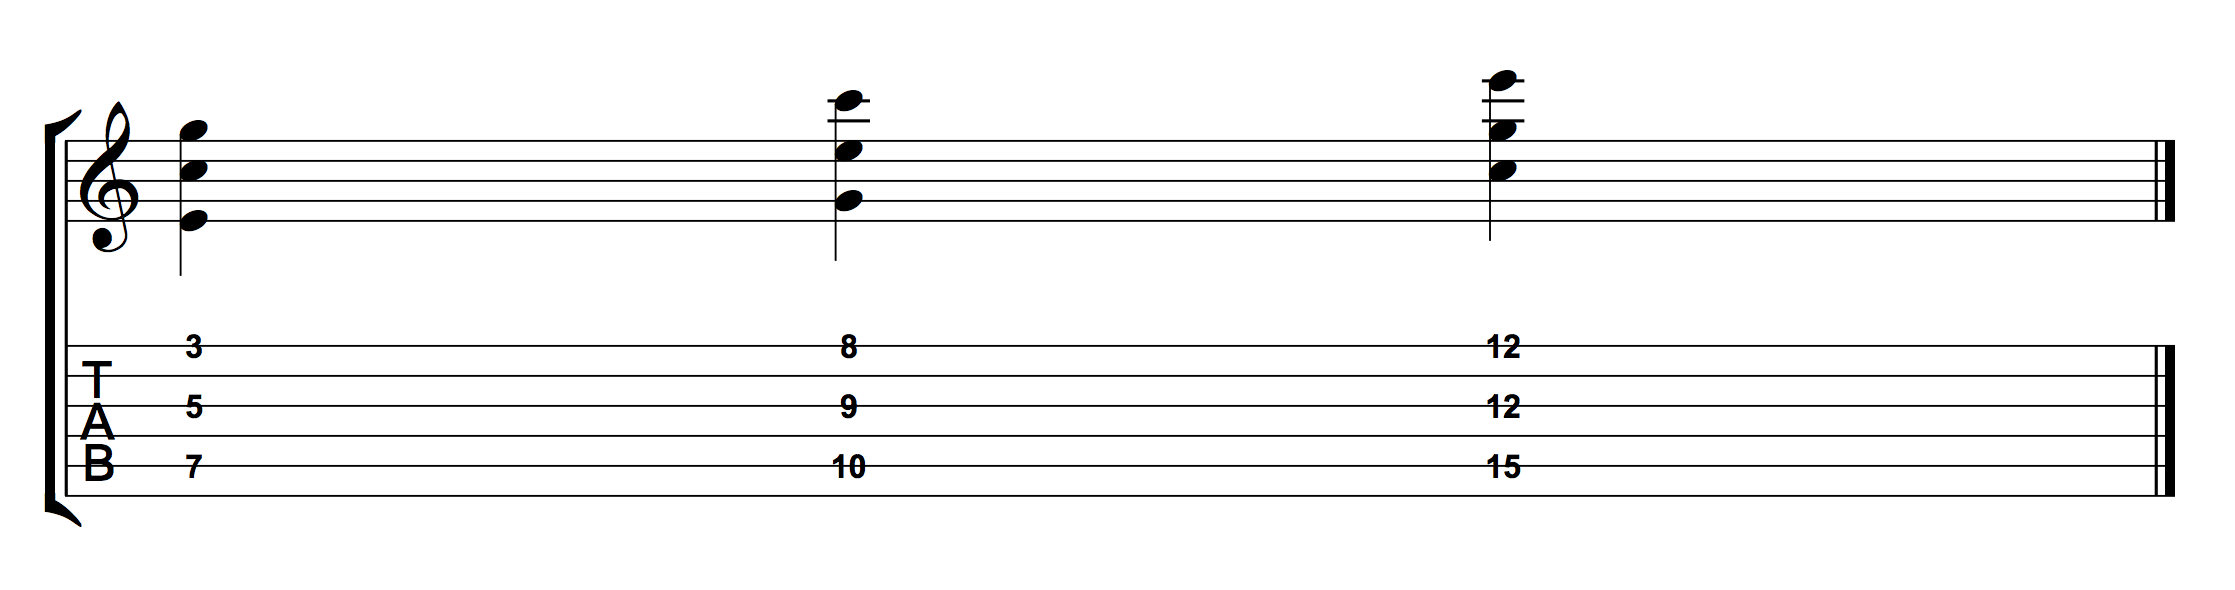
Here is how we would play these shapes, one after the other, in the example key of C.
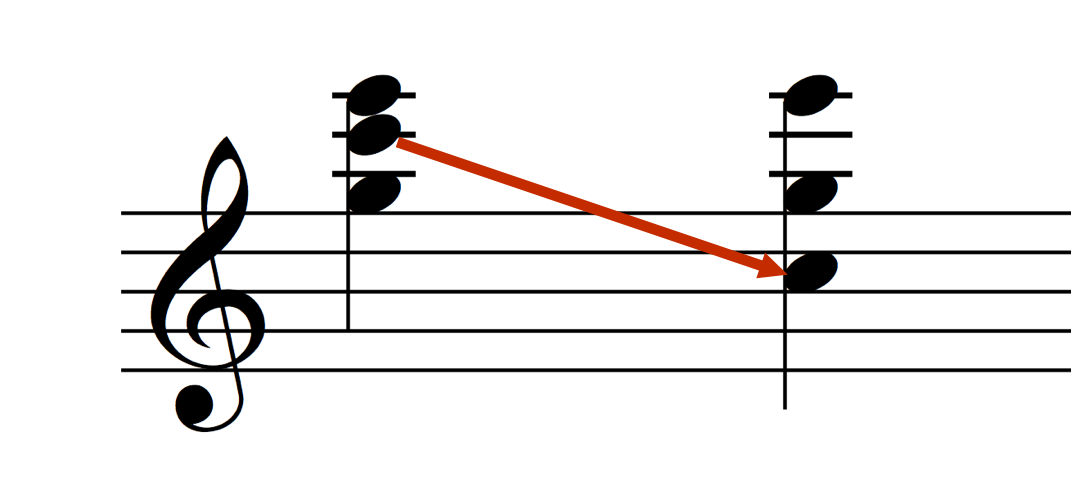
There really is no nothing new going on here. The only thing to keep in mind is that we are using the C major triad as the example key. When we play the C major triad using the first three strings, the lowest shape possible is the root position C major chord, whereas on this next group of strings, the lowest possible shape is the 2nd inversion chord.
If we started from the root position shape in the key of C major, it would look like this:
As you can see, this goes way beyond the 12th fret, which is not necessarily a bad thing, but as a rule of thumb, it’s good to learn everything within 12 frets. If you can do that, anything beyond the 12th fret simply becomes a repetition of everything below the 12th fret (albeit up the octave).
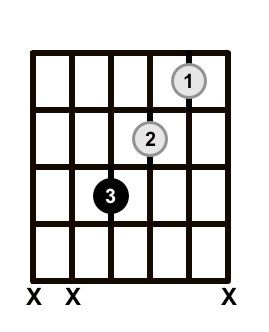
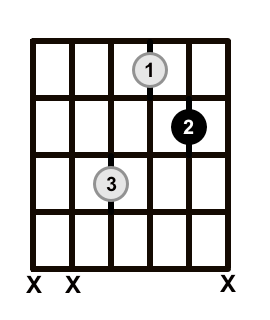
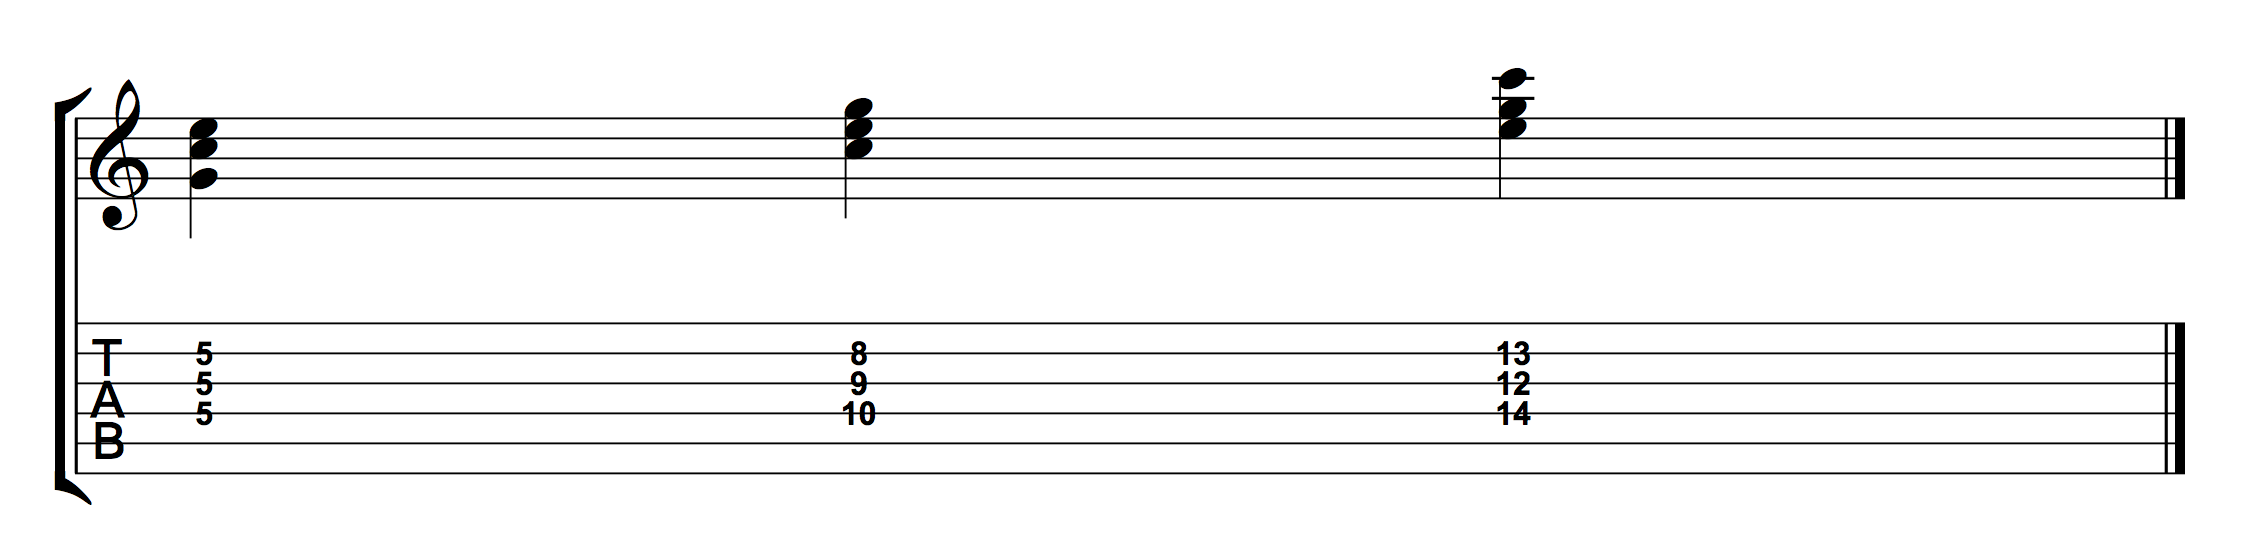
Let’s keep going. We’re going to look at the same voicings for string grouping (3, 4, 5). Again, if the process we’re using is confusing, go back and read the original lesson on producing triads in the one key.
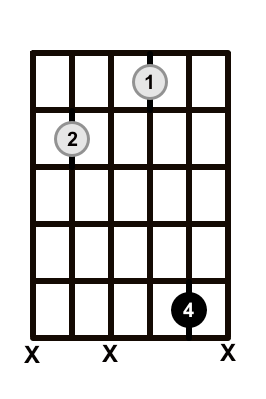
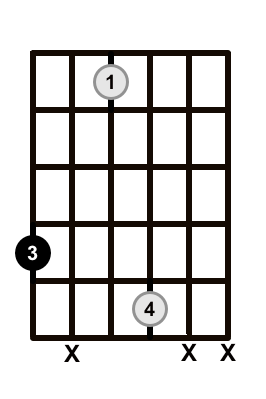
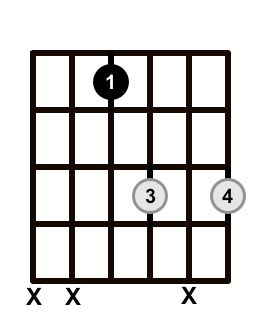
String Grouping (3, 4, 5)
Root Position (Maj Triad)
1st Inversion (Maj Triad)
2nd Inversion (Maj Triad)
In the key of C…
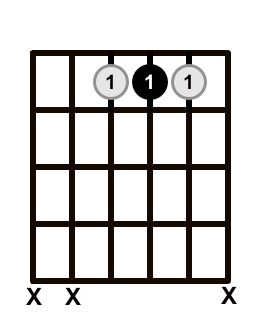
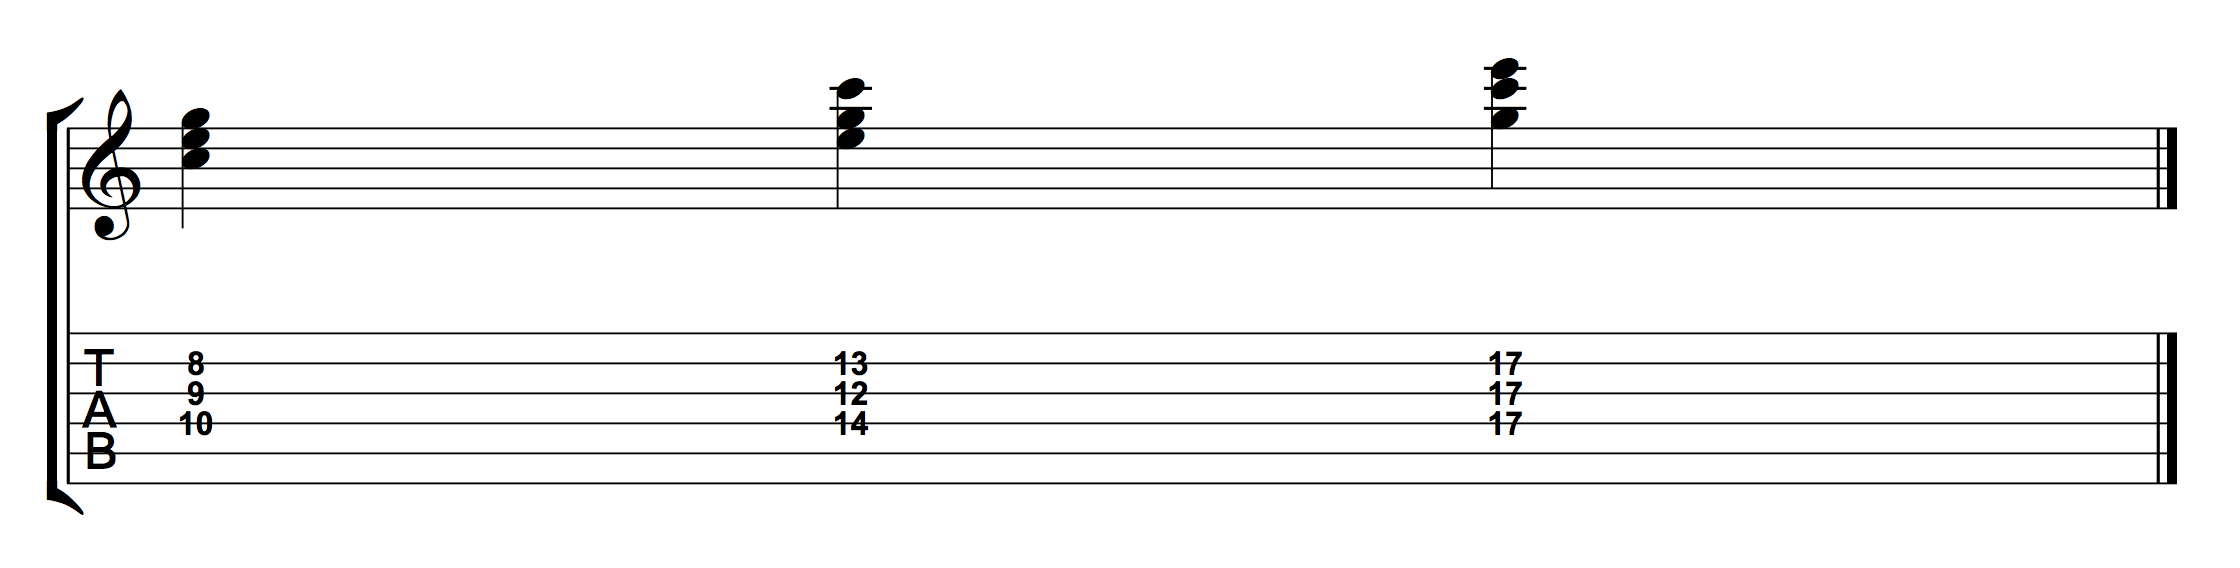
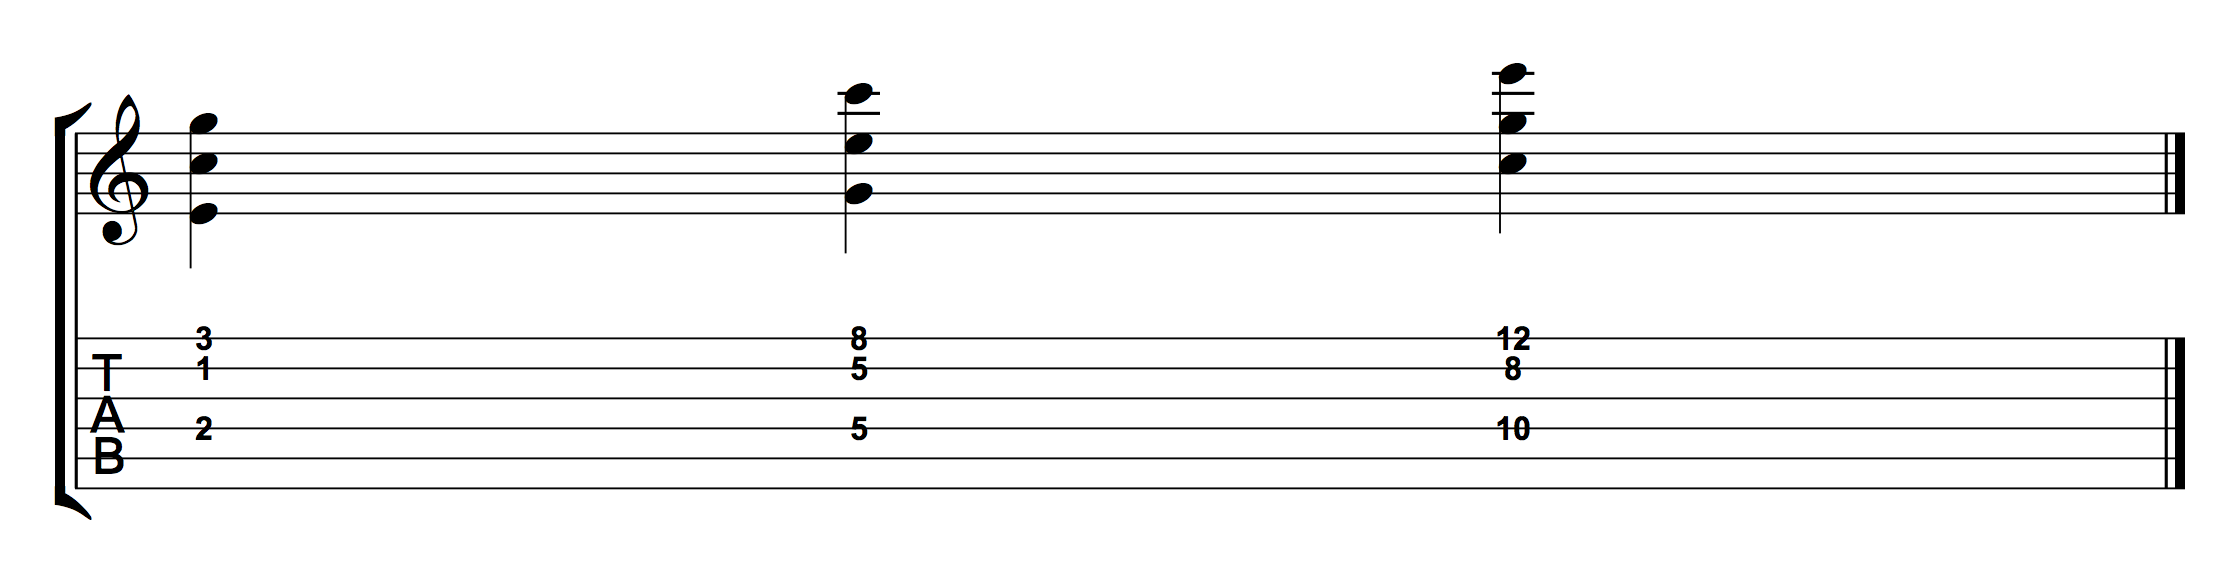
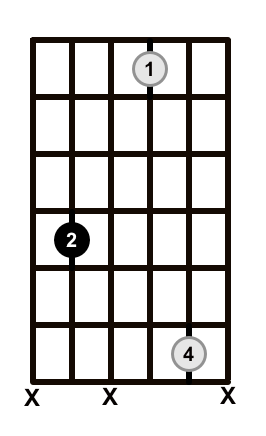
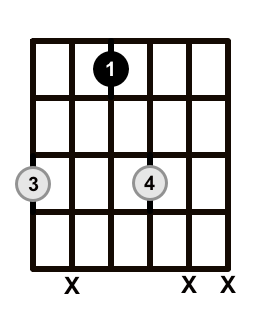
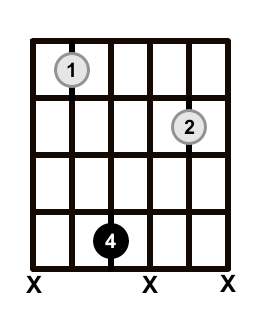
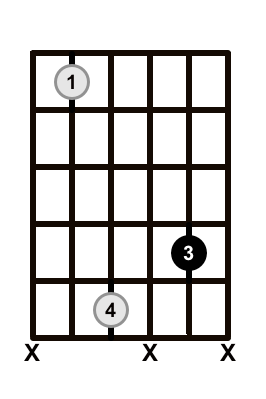
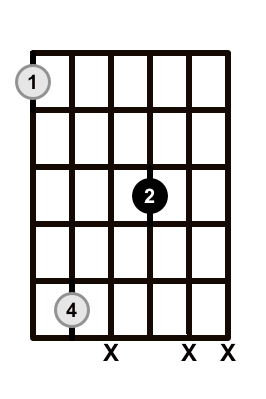
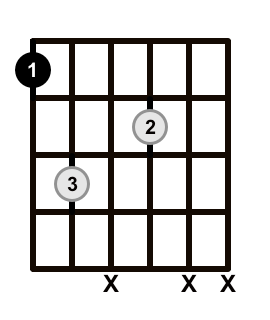
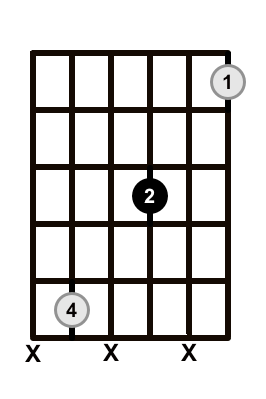
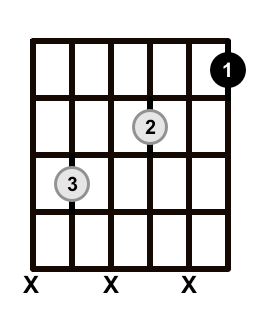
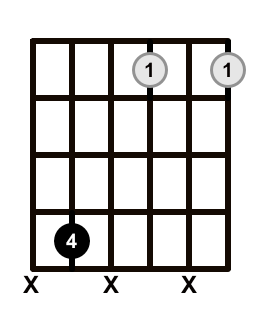
String Grouping (4, 5, 6)
Here are the same voicings on the 4th 5th and 6th strings:
Root Position (Maj Triad)

1st Inversion (Maj Triad)
2nd Inversion (Maj Triad)
In the key of C…
So with just one triad, we have already produced 12 different ways of playing one chord. Some of the shapes look the same, but are played on a different string grouping, in a different position. Some of the voicings are identical, but played using different strings in a different position.

We have covered every possible combination of adjacent strings of three. But what if the strings aren’t adjacent? What if we take the 1st, 2nd and 4th strings, or the the 1st, 3rd and 5th strings?
All of a sudden we have a lot more combinations to work with.
Dropping Notes
The beauty of what we’ve done so far is that it has been very methodical. Often as guitarists, we neglect the opportunity to explore and analyse the material that we play, because the fretboard can seem like a jumble of notes. We often simply learn shapes and accept that they simply are what they are, without delving deeper.
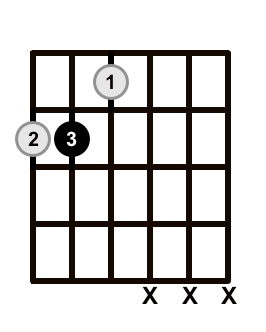
When we use split string groupings (strings that aren’t adjacent), it becomes difficult to replicate the basic voicings that we have used so far. Let’s take the string group of the 1st, 2nd and 4th strings. Playing the root position triad in the key of C major (C, E, G) would theoretically look like this:

As you can see, this is almost impossible to play, and simply impractical. But this is not the end of the story. We can still apply a clear and methodical approach, just like we did with the first three strings. What we need to do though, is to drop one of the notes down the octave.
By taking one note of the chord, and ‘dropping’ it down one octave, we are able to comfortably play triads using this string grouping. The triads will still be made up of three notes (without doubling up any notes) and all the inversions will also be possible.
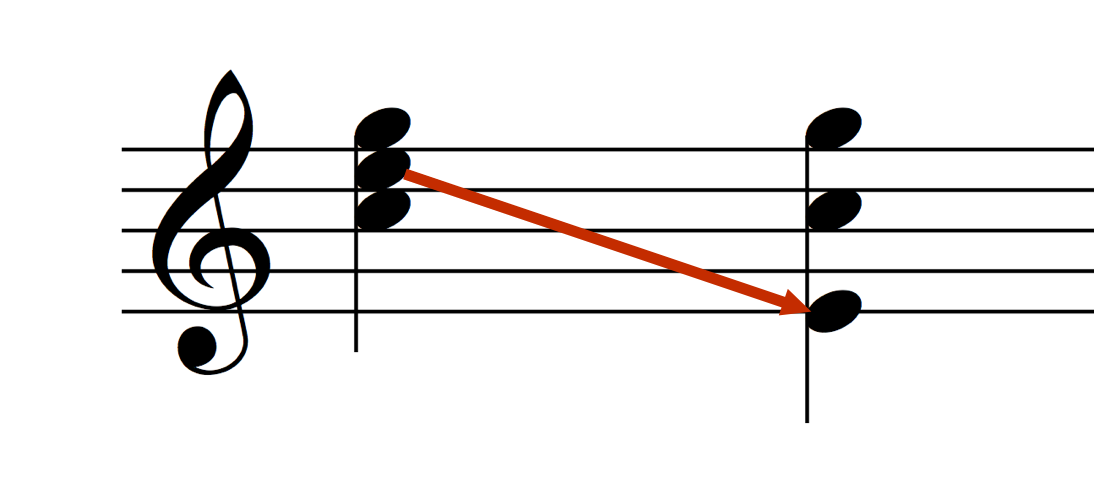
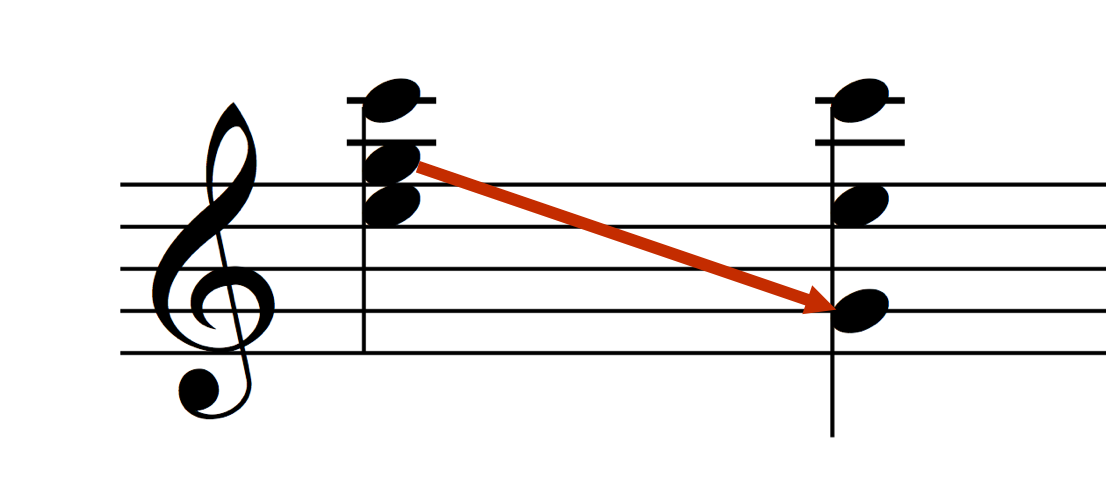
We’re now going to look voicings known as ‘drop 2’. What this means is that the 2nd highest note of the chord (pitch-wise) gets dropped down the octave. Look at the following images of each inversion transitioning to a ‘drop 2’ voicing:
Root Position As ‘Drop 2’ Voicing
1st Inversion As ‘Drop 2’ Voicing
2nd Inversion As ‘Drop 2’ Voicing
This can be a little confusing, because as you might have noticed, our root position drop 2 voicing (for example) no longer has the root note in the bass. So can it still be called a root position chord if the root note is not in the bass? Well, yes and no. Technically, a root position chord has the root note in the bass, so it’s hard to call it a true root position chord, but the label in this case simply exists as a way of explaining how we’ve arrived at the voicings that we’re using. We’re going to come back to labels later on, but for now, we’re going to stick to these half-correct labels.Now that we’ve dropped the the 2nd note of each voicing down the octave, we can play them on our new string grouping of 1st, 2nd and 4th strings (1, 2, 4). Here are the shapes:
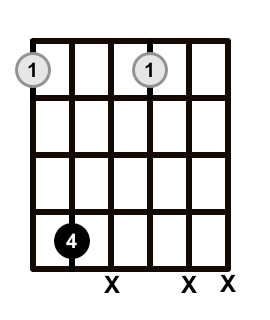
String Grouping (1, 2, 4)
Root Position (Maj Triad)
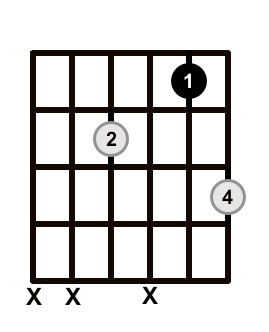
1st Inversion (Maj Triad)
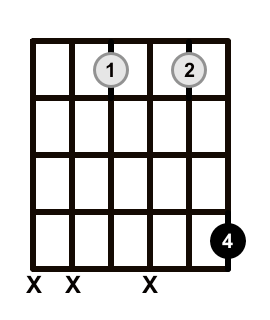
2nd Inversion (Maj Triad)
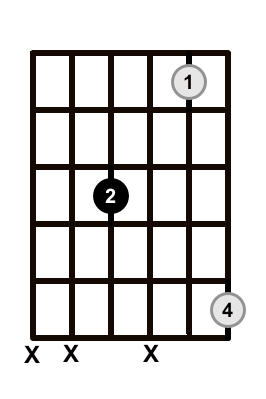
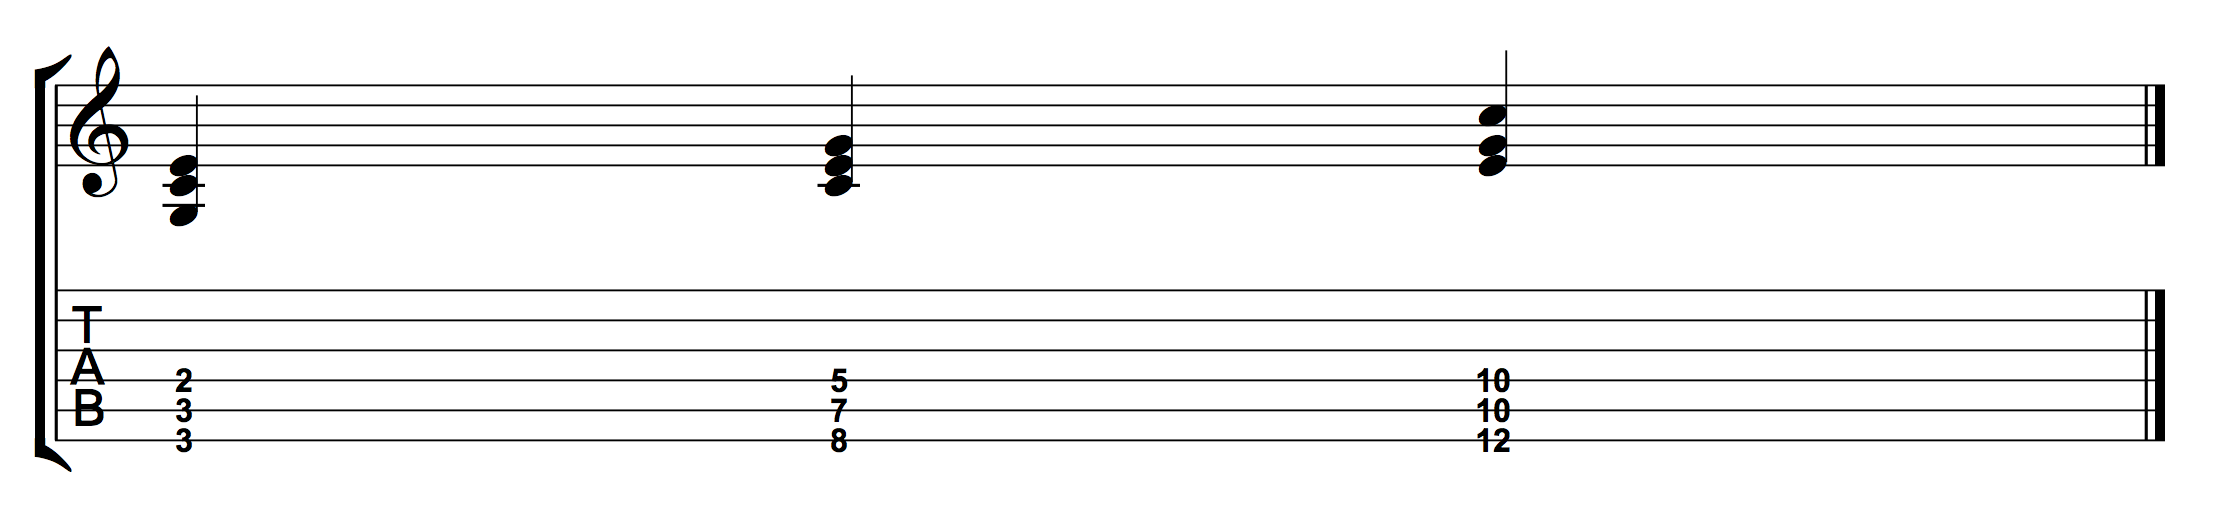
Played in the key of C, within the first 12 frets, looks like this:
Play the voicings yourself. The great thing about using these voicings is that because one of the notes has been moved down the octave, they have a unique sound. There is a wider range of pitches in each chord, compared to the original voicings, which creates a full sound.
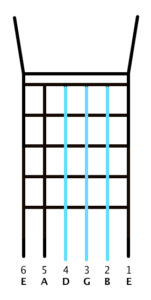
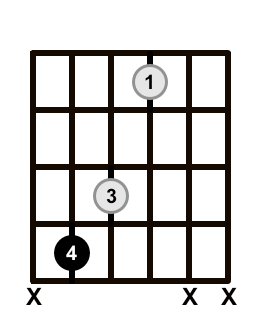
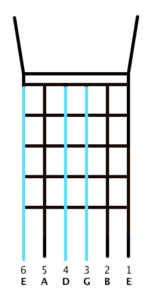
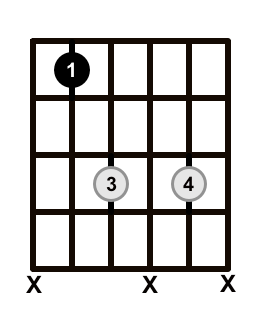
We’ve just looked at major triads with the string grouping (1, 2, 4). We’re now going to use the 2nd, 3rd and 5th strings (2, 3, 5), and then the 3rd, 5th and 6th strings (3, 5, 6).
Here is a visualisation of the string groupings:
String Grouping (1, 2, 4)
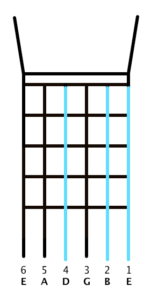
String Grouping (2, 3, 5)
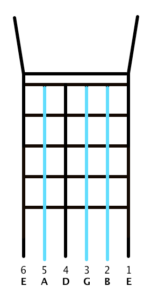
String Grouping (3, 4, 6)
String Grouping (2, 3, 5)
Root Position (Maj Triad)
1st Inversion (Maj Triad)
2nd Inversion (Maj Triad)
Played in the key of C..
String Grouping (3, 4, 6)
Root Position (Maj Triad)
1st Inversion (Maj Triad)

2nd Inversion (Maj Triad)
In the key of C…
The next set of string groupings uses the same drop 2 method as the previous string sets. In fact, the voicings are exactly the same, but the middle string of each grouping has now moved up one string.
Here are the string groupings:
String Grouping (1, 3, 4)

String Grouping (2, 4, 5)

String Grouping (3, 5, 6)
Here are the shapes:
String Grouping (1, 3, 4)
Root Position (Maj Triad)
1st Inversion (Maj Triad)

2nd Inversion (Maj Triad)
In the key of C…
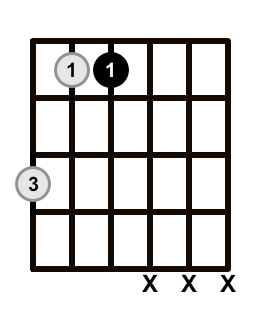
String Grouping (2, 4, 5)
Root Position (Maj Triad)
1st Inversion (Maj Triad)
2nd Inversion (Maj Triad)
In the key of C…
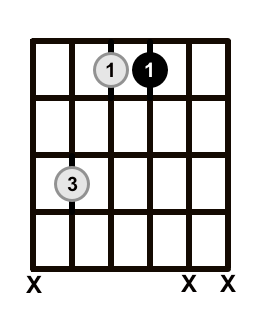
String Grouping (3, 5, 6)
Root Position (Maj Triad)
1st Inversion (Maj Triad)
2nd Inversion (Maj Triad)
In the key of C…
We’re going to look at two more string groupings:
String Grouping (1, 3, 5)
String Grouping (2, 4, 6)
These string sets also use the drop 2 method. The shapes look like this:
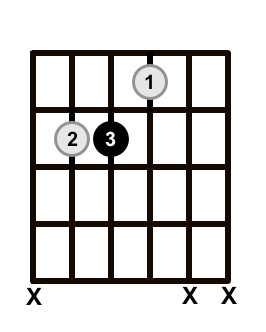
String Grouping (1, 3, 5)
Root Position (Maj Triad)
1st Inversion (Maj Triad)
2nd Inversion (Maj Triad)
Played in the key of C…
String Grouping (2, 4, 6)
Root Position (Maj Triad)
1st Inversion (Maj Triad)
2nd Inversion (Maj Triad)

So that’s it. We have produced 42 unique ways of playing the major triad in any given key. You might be wondering if there are more possibilities. There are. We haven’t explored string sets such as the 1st, 4th and 5th, for example.
You could technically do this to produce even more shapes/voicings. It would be a good exercise just for the sake of putting the concepts in this lesson to work. You might uncover voicings that you particularly like. However, some string groupings aren’t as practical. when the interval between any two strings becomes too big, the chords start to sound unbalanced. This is of course subjective, so if you want to explore the extra shapes and add them to your arsenal of chords, by all means do so. But in this lesson, we are stopping at 42.
Doubling Up On Notes
Another thing to point out is that in each of the voicings that we have used, we haven’t doubled up on any notes. None of the voicings have two root notes, or two octaves of the 3rd. We have avoided this to keep the triads ‘pure’. Whenever you double up on notes, you emphasise one of the chord tones, which can create an imbalance. It’s also not as practical for the purposes of creating inversions.
Again, this is something that you can and should experiment with. Try playing through some of the voicings that we have already produced, and doubling up on one or two of the notes by using the strings that aren’t already in use. This is a great way to test your knowledge and explore the fretboard.
It’s also worth noting that when we play the standard major chords that every guitarist learns, such as the open C chord, or the standard bar chords, we are doubling up on multiple notes. We went into depth on this in the previous lesson. Doubling up on notes creates a bigger, fatter sound, which is perfect for many styles, such as pop, rock and folk. However, it doesn’t lend itself effectively to producing permutations along the fretboard and being methodical when exploring chords.
Identify The Root Note
So how on earth are you meant to remember 42 different ways of playing the one chord? Good question. The best approach is to identify the root note in each voicing, and associate the chord with the root note. In each of the shapes that we have looked at so far, the root note is highlighted. When you learn and practise each shape, you should consciously observe where the root note is and associate the shape with its root note, so that it becomes a kind of compass for the shape. This is really the same process we use when playing a standard bar chord. When we play the root-6 bar chord in the 5th fret (for example), we know that it is an A major chord, because the 6th string is the root note, and the 5th fret of the 6th string is ‘A’.
With all of the unique shapes in this lesson, you can follow the same process. It simply means that for every shape you learn, you have to remember which string the root note is on.
We’ve used labels throughout this lesson with each shape that we’ve looked at, but as I mentioned earlier, these labels can be confusing, and aren’t very practical for every day use. My advice is to simply do away with them. There are many shapes to learn, and it’s not necessary to give each shape a label. All you need to remember is how the chord is played, what type of chord it is (major etc.) and importantly, where the root note is. Of course, it’s good to be able to sit there and analyse a shape and identify where it came from just to demonstrate to yourself that you understand the process, but practically speaking, all you really need to know is the name of the chord, the shape, and where the root note is.
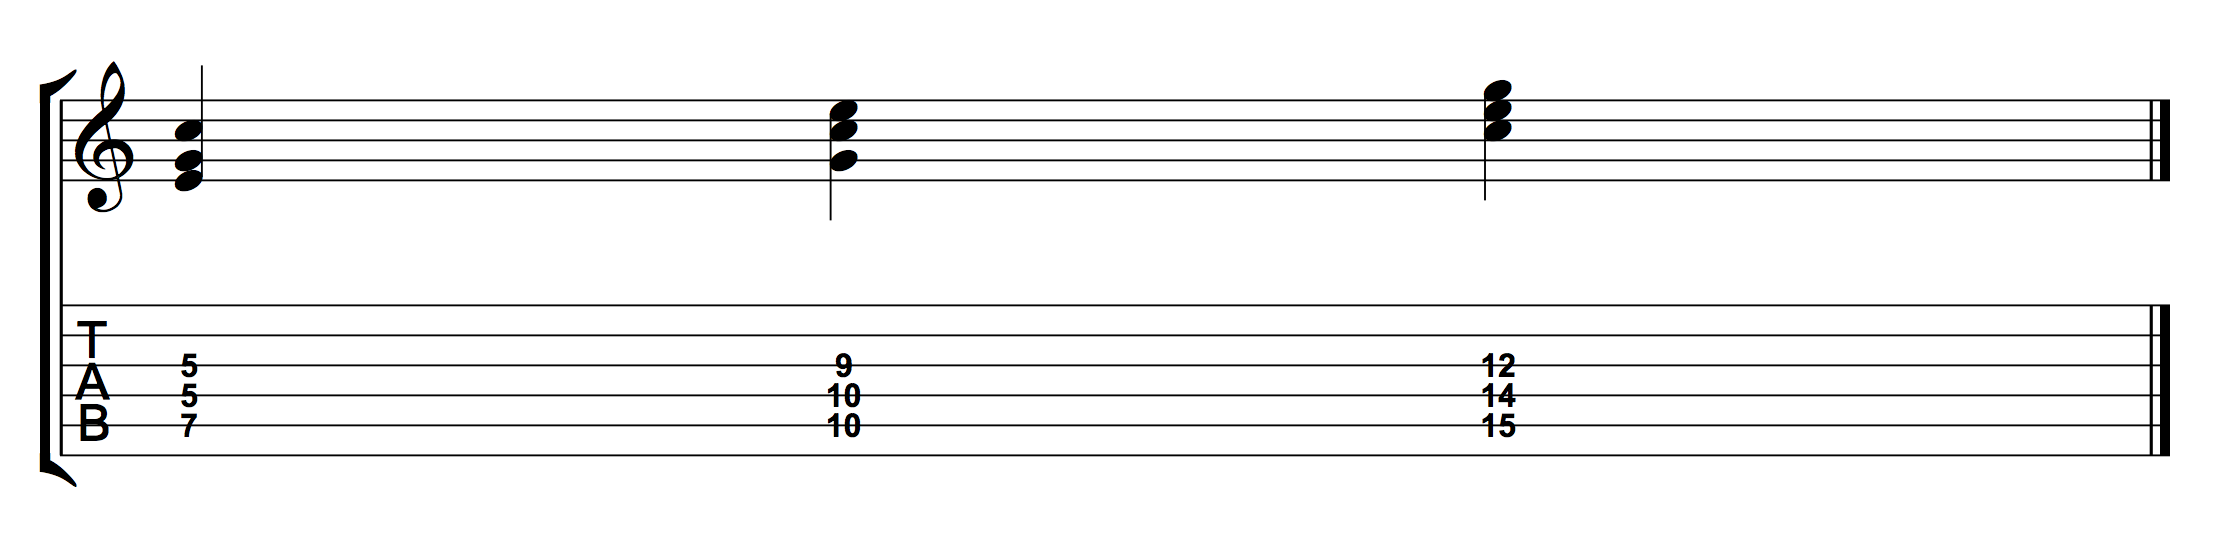
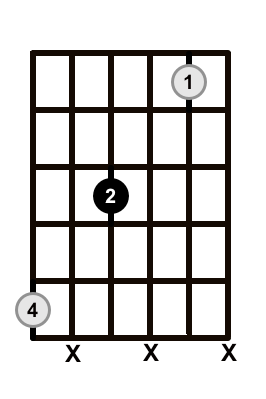
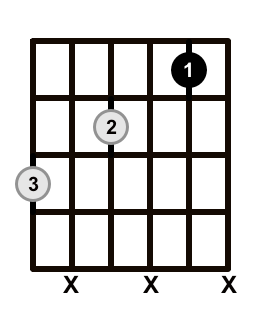
Let’s say for example that you are around the 7th fret of the guitar, and want to play a D Major triad, using the D on the 7th fret of the 3rd string as your root note. Since the root note is on the 3rd string, you can use any of the shapes that we have looked at where the root note falls on the 3rd string.
As you can see, there are eight possible shapes that we can use.
Restrict Yourself To Learn The Shapes
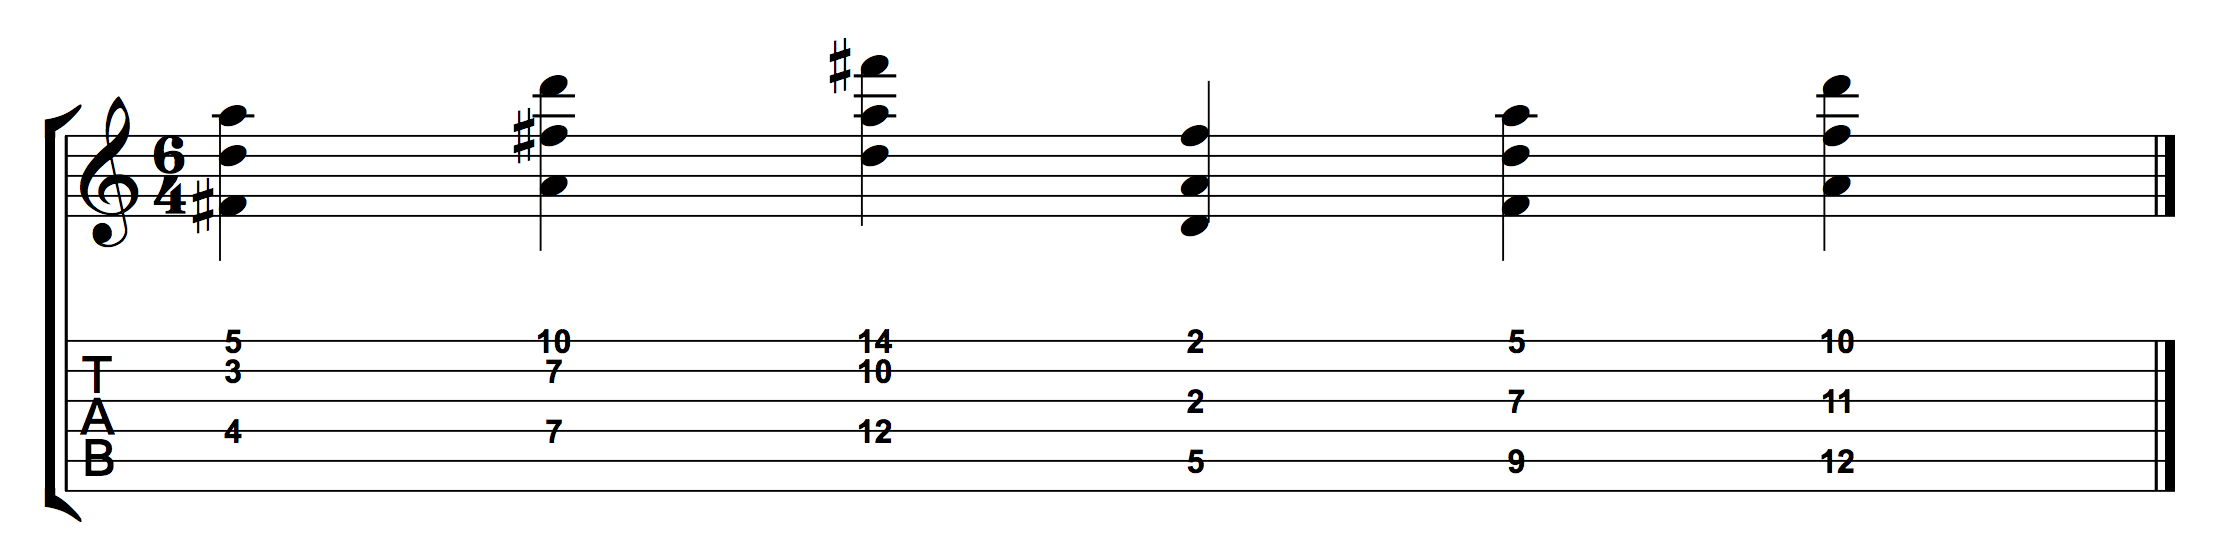
A good approach when starting out, is to pick one or two string groupings, and play through different chord progressions while being limited to the string groupings that you have chosen. Let’s say we use string grouping (1, 3, 5) and string grouping (1, 2, 4). That gives us six shapes to use:
The first thing you need to be able to do is play all 6 chords in one key. You can do this by picking random keys or by using the cycle of 4ths/5ths. The idea is to get familiar with each shape and also to be able to quickly locate each chord based on where the root note is.
The following is an example of playing through each of the 6 chords in the key of D. We will start with the lowest possible shape using the ‘1, 2, 4’ string grouping, play through the 3 chords for that grouping, then play the lowest possible shape for the ‘1, 3, 5’ grouping and do the same thing:
Here is the same process using A Major triads:

This obviously requires a pretty good knowledge of the fretboard, so that at any given moment, you can locate a note in a certain position, and use this as the root note that will determine which shape you play.
What you will also find is that by playing a set or sets of shapes in one key (and then another key etc) you will start to feel them kind of fitting together. You will associate the shapes with each other and be able to intuitively move from one to another, just like when you start to master the chords of a song.
Play Chord Progressions
One of the most effective ways of mastering new material – that is, converting something from a theoretical understanding to a tool that can be used effectively and convincingly, is to apply it to a musical situation. This usually involves composing material, or applying it to music that you are already familiar with.
What we are going to do now is take a simple chord progression and apply the new chords that we have learned to it. We’ve learned 42 chords, so we’re obviously not going to use them all. We’re going to take the approach of picking a few (the 6 that we focused on before) and apply them to this one chord progression.
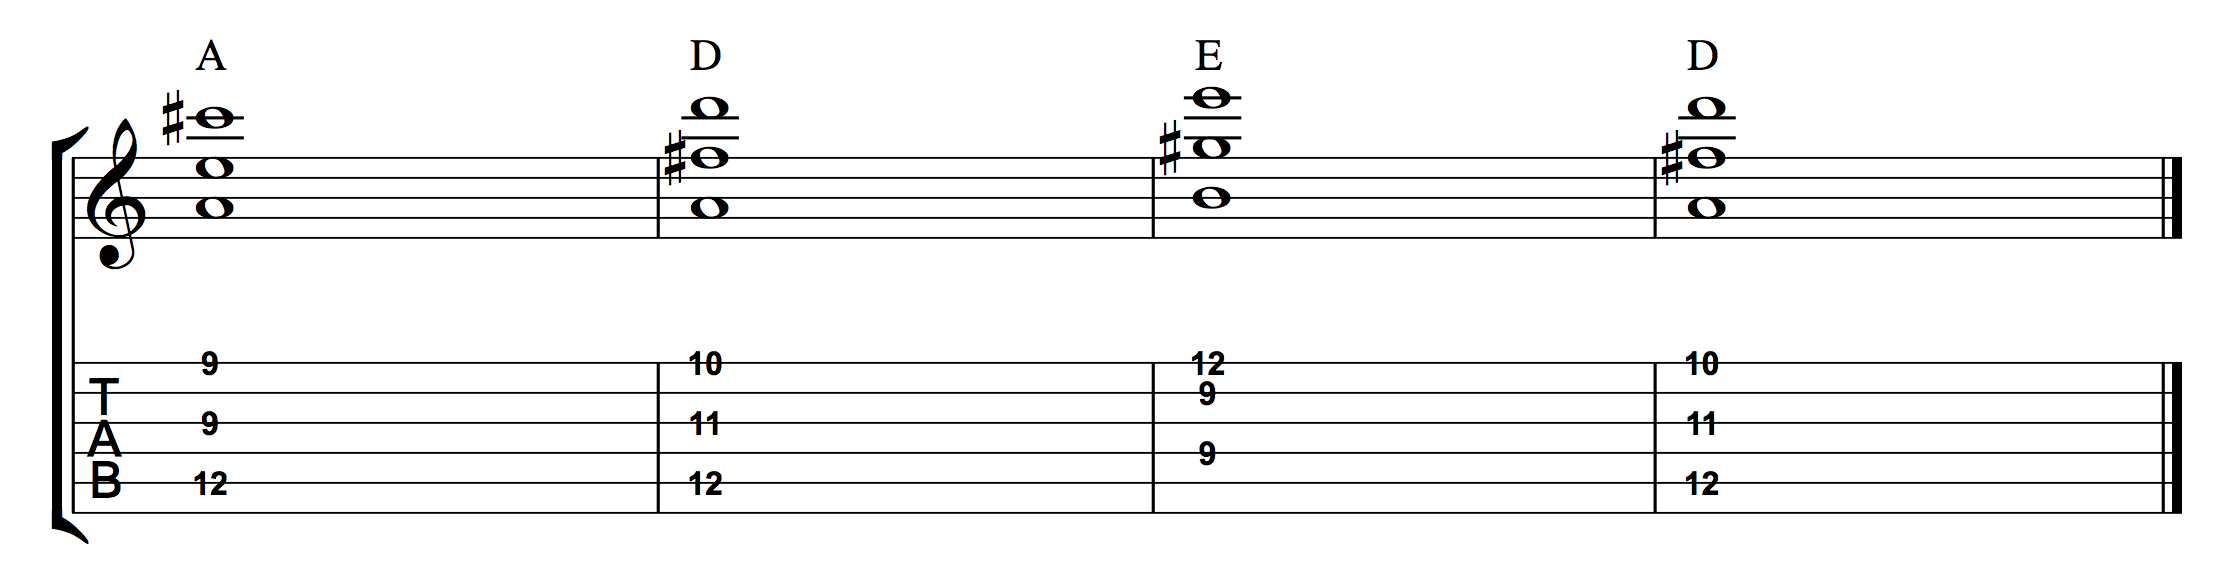
The chord progression uses the chords A, D and E, and looks like this: A good approach is to stick to one area of the fretboard, and try to play the triads in that position. You don’t have to be super strict with this. You can move around as you need, but try to stay in one general area. You can use whichever shapes you like but as I’ve just mentioned, it’s good to limit yourself to a few shapes when starting out, and slowly add more shapes as you become familiar with them.
Here is an example using the six shapes that we’ve just looked at:
Example 1
As you can see, it is not hard to stay in the same position. Even in one general position, there are options for every chord.
Here is another example of the same chord progression, using the same shapes but in a different position.
Example 2
These are just two examples. There are many more possibilities and combinations. You should continue to explore different positions and combinations until you start becoming familiar with each of the shapes. Eventually, you will be able to recall each of the shapes like you can with simpler chords, such as open chords, or basic bar chords.
To be able to really explore these shapes and chords, you need to have a good knowledge of the notes along the fretboard. Remember, we identify each chord through its root note. When we’re looking for somewhere to play the E major chord (for example), our first step is to find an E note and then insert the triad, making sure that the E note aligns with the root note of the shape that we use.
If you’re not super confident with the notes on the fretboard, don’t worry. As long as you know the principles of how to figure out the notes on the fretboard you’ll be fine. In fact, exploring chords is one of the best ways of developing a solid knowledge of the fretboard, because it forces you to constantly identify notes and become familiar with them.
Keep Exploring
Keep exploring and using the triads in musical situations. The possibilities are endless. Try sticking to one position. Then try moving around as much as possible. Then try moving progressively further up the neck with each chord. Or down the neck. Try sticking to one string set. Or alternating between different string sets. Try using good voice leading techniques.
Of course, try different chord progressions and applying the triads to songs and ideas that you’re already familiar with.
There are so many possibilities that it can be overwhelming. This is why it’s good to stick to just a few shapes at first and become familiar with them. You will find that by using them exclusively for a short while, they will become part of your arsenal of chords. You will start to use them instinctively, without having to think.