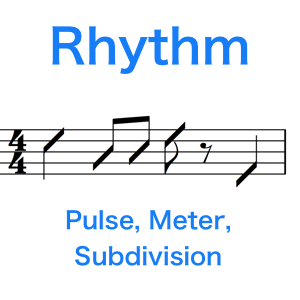
Chords

Functional Harmony – The Relationship Between Chords And Modes

Understanding and using modes on the guitar is very important. It takes many hours of practice memorizing the positions, analyzing qualities of each scale and digesting all the theory that goes with it. It’s important to realize however, that an understanding of modes is not really complete without a good understanding of how they relate to diatonic chords. Chords and scales are very closely linked and a strong understanding of chords aids the use of scales and visa versa. In this post we are going to explore how modes relate to the diatonic chords of a major scale.

Firstly, I’m assuming for the sake of this lesson, that you have a basic understanding of modes. You don’t have to be a master just yet. In fact, hopefully this lesson will help you on your way. If you don’t have at least a basic understanding of modes, please read the post, guitar modes explained. I’m also assuming that you have a basic undertstanding of chords and how they are constructed. If not, please read the post on chord construction before moving on. Assuming you know a bit about both areas, let’s explore their relationship a bit further.

The Basics Of Chords – Triads:

A triad is 3 notes played together, usually stacked in thirds. That means that if we are in the key of C, we can form a C Major chord by playing the root note (C), a third up from there (E) and a third up from there (G). That would give us the following three notes that form a C Major chord:

C – E – G

If we wanted to play a C minor chord, we would need to lower the 3rd note of the scale (E) to produce an E flat. We would then get the following for a C minor chord:

C – Eb – G

There are 4 types of triads:

Major – 1, 3, 5
minor – 1, b3, 5
Augmented – 1, 3, #5
diminished – 1, b3, b5

This is just a brief recap of a bit of chord theory.

Now, what we want to do in this lesson is explore the diatonic chords of a major scale. What that basically means is that we are searching for the ‘set of chords’ that fit in any given key, based on the major scale for that key. Let’s look at the key of G.

In the key of G, we have the following 7 notes (G major scale)

G – A – B – C – D – E – F#

Producing the diatonic triads of G Major is quite easy. All we have to do is go through each note of the scale and ‘stack thirds’ on top of each. The important thing to keep in mind is that we MUST stick to the notes of G major, because we are constructing chords in that particular key. Observe the following chart.

1: G – A – B – C – D – E – F#
2: A – B – C – D – E – F# – G
3: B – C – D – E – F# – G - A
4: C – D – E – F# – G - A - B
5: D – E – F# – G - A - B - C
6: E – F# – G - A - B - C - D
7: F# – G - A - B - C - D - E

From that chart, we get this:

1: G - B - D
2: C - E
3: D - F#
4: C - E - G
5: D - F# - A
6: E - G - B
7: F# A - C

If we then label those chords, we get the following:

1: G Major
2: A minor
3: B minor
4: C Major
5: D Major
6: E minor
7: F# diminished

What we now have is a pattern of chords that can be applied to any key. Just like the way that modes can be played in different keys. We did this example in the key of G, but what is really important is the chord types and the degree of the scale they relate to. For example, the first chord is a Major chord, the second chord is a minor chord, the third chord is a minor chord, and so on. These ‘numbers’ are usually represented by roman numerals, which looks like this:

I – Maj
ii – min
iii – min
IV – Maj
V – Maj
vi – min
vii – dim

The upper case roman numerals represent a Major chord and the lower case roman numerals represent a minor chord (a diminished chord is technically a type of minor chord because it has a flat 3). Knowing which type of chord goes with which number is really what this whole lesson is about. If you understand the numbers and chords, you can quickly produce the relevant chord in any key for a certain number, for example, the IV chord in the key of C is F major, the vi chord in the key of A is F# minor, the ii chord in the key of E is F# minor, and so on and so on. As well as the roman numerals, there is also a name for each of these degrees of the scale:

I – tonic
ii – supertonic
iii – mediant
IV – subdominant
V – dominant
vi – submediant
vii - leading tone

The reason why each of these degrees have names is because each chord has a certain harmonic function. This means that when used in the right context, they produce a certain mood, or intention.

Ok, let’s just stop there for a minute. That is quite a bit of theory already and we haven’t even really looked at modes yet. So let’s sort out a few priorities for this lesson. Don’t worry about the names (tonic, dominant etc). All you really need to know at the moment is that you can build a chord on each degree of the major scale to produce a set of chords that fit in that particular key. And there is a pattern to this that can be applied to any key. A good thing to do here is to pick a key, figure out the diatonic triads in that key and improvise a few chord progressions. You’ll be surprised at how easy it is. For example, in the key of F, the ‘set of chords’ would be this:

I – F
ii – Gm
iii – Am
IV – Bb
V – C
vi – Dm
vii – E°

Just playing through the chords will give you a sense of how they all work together, which is very important. Hearing them ‘fit together’ is just as important (if not more) as understanding them theoretically.

7th Chords

In our analysis of diatonic chords so far, we have looked at triads. We can apply this whole concept to 7th chords as well. Triads are 3-note chords stacked in 3rds. 7th chords are simply 4-note chords stacked in 3rds. They are called 7th chords because the 4th note is the 7th note of the scale (1-3-5-7). We don’t need to go through all the theory again, but let’s look at the original charts and apply them to the diatonic 7th chords of a major scale. Again, we will use the key of G as our example:

1: G - A - B - C - D - E – F#
2: A - B - C - D - E - F# – G
3: B - C - D - E - F# - G - A
4: C - D - E - F# - G - A - B
5: D - E - F# - G - A - B - C
6: E - F# - G - A - B - C - D
7: F# - G - A - B - C - D - E

From that chart, we get this:

1: G - B - D – F#
2: C - E – G
3: D - F# – A
4: C - E - G – B
5: D - F# - A – C
6: E - G - B – D
7: F# A - C – E

If we then label those chords, we get the following:

1: G Major 7
2: A minor 7
3: B minor 7
4: C Major 7
5: D Dominant 7
6: E minor 7
7: F# minor 7 (b5)

Again, let’s derive the pattern from the above information and apply it to the roman numerals:

I – Maj7
ii – min7
iii – min7
IV – Maj7
V – 7
vi – min7
vii – min7 (b5)

If you are a bit confused by the names of the chords. Read the post on chord names to get a better understanding.

Triads vs 7th Chords:

One thing to keep in mind, is that from a functional point of view, triads and 7th chords act the same. That means that the IV chord of any key will have the same ‘effect’, regardless of whether or not you play it as a triad or a 7th chord. Which one should you use then? It really comes down to taste and style. Jazz for example uses a lot of 7th chords (and extensions past that as well, such as 9th chords, but that’s for another lesson) whereas folk music uses mainly triads. Yet both styles are heavily grounded in ‘functional harmony’. Again, it’s important to put this theory to practice. Experiment with playing the 7th chords in a chosen key, then do the same but use only triads. Really listen to how they sound and the emotional qualities of each chord.

Finally – The Role Of Modes:

One thing you should realize (and maybe you already have) is that if you understand the concept of modes and you understand the principles of diatonic chord construction that have been outlined in this lesson, the relationship between the two should be very obvious. In fact, an exporation of chords is almost an exploration of diatonic chords, and visa versa.

Let’s look at the 7 modes of a key and the 7 diatonic chords of a key:

7 Modes

I - Ionian (1 – 2 – 3 – 4 – 5  - 6 – 7)
ii – Dorian (1 – 2 – b3 – 4 – 5 – 6 – b7)
iii – Phrygian (1 – b2 – b3 – 4 – 5 – b6 – b7)
IV – Lydian (1 – 2 – 3 – #4 – 5 – 6 – 7)
V – Mixolydian (1 – 2 – 3 – 4 – 5 – 6 – b7)
vi – Aeolian (1 – 2 – 3 – #4 – 5 – 6 – 7)
vii – Locrian (1 – 2 – 3 – #4 – 5 – 6 – 7)

7 Diatonic Chords

I – Major 7 (1 – 3 – 5 – 7)
ii – minor 7 (1 – b3 – 5 – b7)
iii – minor 7 (1 – b3 – 5 – b7)
IV – Major 7 (1 – 3 – 5 – 7)
V – Dominant 7 (1 – 3 – 5 – b7)
vi – minor 7 (1 – b3 – 5 – b7)
vii – Minor 7 flat 5 (1 – b3 – b5 – b7)

You should be able to see, that each mode ‘fits’ over the respective chord (with the same roman numeral). Each chord tone from any given chord, is contained in it’s respective mode. For example, the tones of the iii chord (1, b3, 5, b7) are contained in the 3rd mode (phrygian). This really is logical, because we essentially use an identical process to produce chords and to produce modes. Understanding this is really where an understanding of the synergy between modes and chords lies. When a ii chord is being played (min7) you can construct solos using the dorian mode. When a IV chord is being played, the lydian mode is the mode you want. There are of course exceptions to the rule, and once you are really comfortable with chord/scales, bending the rules becomes the challenge, but when starting out, you need to get comfortable with the rules before breaking them.

A Few More Points:

One of the things that most beginners get confused by, is the fact that chords that seem identical, use different modes. For example, the ii chord is a minor 7 chord and the iii chord is also a minor 7 chord. Yet the 2nd mode, Dorian contains only a flat 3 and flat 7, whereas the 3rd mode, Phrygian contains a flat 2, flat 3, flat 6 and flat 7. How can two seemingly identical chords have a different set of notes that fits over each one? It can be a confusing point, but the easiest way to understand it is to understand that with diatonic harmony, each chord has a specific function. Which is why it is also called functional harmony. This basically means that underneath each chord, there are certain things that are implied. An E minor chord functions differently in the key of C, where it is the iii chord, than it does in the key of G, where it is the vi chord. Because these ‘identical’ chords function differently, they require different modes to be played with them. A good thing to keep in mind is that you don’t even need to understand what these ‘functions’ are. They are felt, or heard, more than they are understood.

Don’t think about it too much. This is the beauty of music. We try to understand as much as we can, but at the end of the day, all that matters is what we hear and how that effects us emotionally. The important thing for now is that you understand and put into practice constructing the diatonic chords of any key.


How To Strum – What is Rhythm?

What is rhythm? Most people have a basic understanding of what rhythm is. Even if they are not aware of it, they react and respond to rhythm just like anybody else. Some people know consciously what rhythm is; they can replicate rhythms perfectly, differentiate between one rhythm and another, but not know what the fundamental theory behind rhythm actually is. To be able to strum effectively on the guitar, rhythm Let’s take some time to look at rhythm from a very basic viewpoint:

The Fundamentals – Beats

Firstly, rhythm is derived from a beat. A beat is simply a pulse that reoccurs over and over again at a consistent speed. It doesn’t slow down and it doesn’t speed up (actually, in some music, the beat does speed up or slow down but for the sake of this exercise, let’s assume it doesn’t) and the speed of that consistent beat is known as “beats per minute” or “bpm”. A speed of 70bpm means that there are 70 beats per minute, which is slower than a speed of 89bpm. The bpm marking is what’s known as the “tempo” of the music.

This is what a constant beat at 80bpm sounds like. The beat is being played on a cowbell.

Guitar Rhythms – Cowbell 80bpm

That is essentially all that a beat is. A boring, repetitive pulse. Rhythm, is about what you do with that beat.

Quarter Notes

This is what a very basic rhythm sounds like. I’m going to play one note over and over again on every beat. A note that goes for 1 beat in duration is called a quarter note. For the sake of simplicity, I am not going to play a chord, just one note.

Guitar Rhythms – Quarter Notes mp3

That was a very easy and straight forward rhythm. In fact, because a quarter note goes for 1 beat, I wasn’t playing anything other than the pulse itself.

Half Notes

Now, to demonstrate that I can play different rhythms over the beat, I will play half notes. Half notes are notes that go for 2 beats each.

Guitar Rhythms – Half Notes

Guitar Rhythms - Half Notes

Again, that is pretty simple. So lets mix it up a little bit by playing a half note, followed by 2 quarter notes. It will sound like this:

Guitar Rhythms – Halves and Quarters

Guitar Rhythms - Halves and Quarters

It should be pretty obvious by now that every example I am giving is inside of a 4 beat pattern. 90% of music is in 4/4, which means the music is divided into bars of 4 beats. That’s why you will often hear people counting “1, 2, 3, 4, 1, 2, 3, 4, 1, 2…” etc. The beat (or pulse) provides the backbone of the music and the measure (4/4) provides the sense of feel and repetition. This is pretty basic stuff and many of you will know this already, but it is good to be thorough! In every example, I am playing the same bar 4 times over.

Eighth Notes

Let’s get a bit trickier with the rhythm now. Rhythm really comes to life when we subdivide the beat. That means for example, playing two notes (evenly spaced) inside each beat, or 3 notes, or 4 notes. When we divide a beat by 2, we are playing 8th notes, which sounds like this:

Guitar Rhythms – 8th Notes

Guitar Rhythms - 8th Notes

Sixteenth Notes

If we divide the beat by 4, we are playing 16th notes, which looks like this:

Guitar Rhythms – 16th Notes

Guitar Rhythms - 16th Notes

It will sound like the speed has gotten faster. In actual fact, the tempo (speed of the beat) is exactly the same, but we are playing a busier rhythm which makes it sound faster. This is the beauty of rhythm. The beat stays the same, but we manipulate what we do over the top to create interest whilst still staying inside the “groove” of the original beat.

A Few Examples

Of course, the above examples are pretty repetitive and boring. Let’s mix up a few of those rhythms to create more interesting ones. Here are a few examples:

Guitar Rhythms – Rhythm Example 1

Guitar Rhythms - Rhythm Example 1

Guitar Rhythms – Rhythm Example 2

Guitar Rhythms - Rhythm Example 2


Counting

Counting is a very effective way to approach rhythm both from a practical point of view and a theoretical point of view. When we count, we are effectively laying down a framework from which we can play different rhythms.

counting 1 2 3 4

Above is the most basic form of counting. It is the ‘infinitive’ rhythm of 1, 2, 3, 4. When we count out loud, we speak each number sequentially in time with the beat. Even if when we play different rhythms over the top of the counting, the 1, 2, 3, 4 count does not change.

Let’s go back and have a look at the examples and see how counting can be used.

counting quarter notes

In this very basic rhythm, we are playing quarter notes on every beat of the bar, therefor we are effectively playing a note on every ‘count’ of the bar. That is why each number is underlined, because there is a note on every count. I am underlining the beats where a note is played.

Let’s look at the next rhythm we did.

Guitar Rhythms - Half Notes
counting half notes

In this rhythm, we are playing 2 notes that go for 2 beats each, which means the first note comes in on the ’1′, then the next note comes in on the ’2′. Keep in mind that even though we are playing notes that go for 2 beats, we still count to 4. This doesn’t change (well, let’s assume it doesn’t, for now). All that changes is the rhythm that we play over the counting.

Another example…

Guitar Rhythms - Halves and Quarters
counting rhythm 1

Here, we have a half note (2 beats) followed by 2 quarter notes (1 beat each). Therefor, the first note starts on the ’1′, and then the next 2 notes come in on the ’3′ and ’4′ respectively. Again, keep in mind that the counting stays constant. What changes is the rhythm.

Subdivision and Counting:

Of course, things get a little bit more complicated when we start subdividing the rhythm. Remember in our earlier example that playing 8th notes requires subdividing each beat into 2 and playing on each of those subdivisions.

Guitar Rhythms - 8th Notes


With this example, we could keep counting 1, 2, 3, 4… and play 1 note on every count, as well as 1 note in between every count. We would then be playing 8th notes. However, there is a more accurate way of using counting to achieve constant 8th notes. This is done by saying the word “and” in between every count. What this literally does is subdivide the beat into 2, so that there is a perfect platform for playing 8th notes. This would look like this when written out using lines to highlight the rhythm.

counting 8ths

It’s important to keep in mind that the 1, 2, 3 and 4 have essentially not changed, there is simply something in between each number now… the word “and”.

Of course, if we subdivide the beat even further into 16th notes, we need some more words to use. When counting 16th notes, we can say “one-e-and-a, two-e-and-a, three-e…” etc.

A constant 16th note rhythm looks like this in notation (from our earlier example)

Guitar Rhythms - 16th Notes

When we count, it should look like this:

counting 16ths

The ‘e’s are usually pronounced literally like saying the letter e. The pluses are pronounced like “and”. The ‘a’s pronounced like the ‘a’ in ‘gorilla’.

Let’s have a look at the last two examples that we originally used and see how they look from a counting perspective. I should make a point about these rhythms. As they switch between subdivisions, you might be confused as to how they should be counted. Remember, even though you are counting does not mean you have to play something on every count. The counting essentially runs in the background and provides the framework from which all rhythms are derived. What generally happens though, is that you find the smallest subdivision of the bar (or perhaps song) and use that as your counting framework. This will make sense when written out.

Rhythm example 1:

Guitar Rhythms - Rhythm Example 1


Rhythm Example 1 Counting


Of course, I could have legitimately counted it out as demonstrated below and played the exact same rhythm, but the benefit of keeping the syllables consistent is that it provides stability, which is very important with rhythm. Being able to execute the approach bellow takes a bit of experience and rhythmic skill.

rhythm example 1b counting

Rhythm example 2:

Guitar Rhythms - Rhythm Example 2


rhythm example 2 counting

Hopefully by now you have a good understanding of the basics of rhythm and can see and hear how simple manipulations of rhythm can affect the feel of the music. Keep in mind that this is a very basic introduction to rhythm. In reality, the topic of rhythm can and should be explored in great depth with the aid of many musical examples. There are also other subdivisions which we have not looked at and a range of notation devices that we haven’t looked at. That’s ok. The aim of this lesson is to introduce the fundamentals for the purpose of strumming on guitar. I have tried to present the information using a very metric, almost mathematical approach, because this translates nicely into strumming on the guitar. Obviously, we haven’t even touched on strumming itself yet, but that will be in the next post and to understand that lesson, you must understand this one.

Quick Links:


How To Strum On The Guitar For Beginners

Strumming on the guitar can be a bit of a mystery for beginners. There are a hundreds of easily accessible chord diagrams out there and lots of songs to put these chords to use. But there seems to be a lack of guidance when it comes to strumming and the correct approach.

Different Types Of Notation

The way chords are presented varies depending on where you look. Some songs are presented with lyrics and chords are written above the lyrics aligned with the specific lyrics where the chord changes. This can be useful if you already have a very clear idea of how the song goes, what the feel of the song is and all you need is the name of the chord to make it all fit together. Another common format is where there is sheet music, perhaps with the melody notated in the traditional format of note heads, rhythms and key signatures etc. and the chords are aligned to specific bars. This also can be quite useful, as it gives you a clear idea of which bar to change chords, but usually it still requires that you know what the ‘feel’ or ‘rhythm‘ is before you can make it sound like the original recording.

There are other methods of notating chords as well. Some are quite detailed and extensive and others are very minimal and vague. It can make things very confusing when starting out on your chords journey. I think one of the reasons why strumming is such a vague topic without many definitive guides available, is because generally speaking, when a guitarist strums, they generally do not stick to the one rhythm for the whole song. There are so many nuances and subtle variations that occur naturally when strumming, that it makes it hard to pick a specific strumming pattern and assign it to a whole song. There are exceptions of course. If you think of the back in black riff by ACDC, you can here a very specific rhythm that is repeated over and over again.

How To Approach Strumming

So what is the solution? How can you practice strumming so that you can eventually just forget about what your doing and strum, with all the nuances and expressions flowing freely from your strumming hand? I think the solution is to first understand the fundamentals of strumming and then learn specific strumming patterns. The second part might seem counter intuitive. If strumming is such a free flowing thing, why should you learn specific rhythms? That is because by learning many specific rhythms, you can eventually draw from them all to express yourself in the moment. Think of it like learning a new language. You learn words by learning to speak specific phrases, but the objective is to be able to eventually match different words together, so that you can create your own phrases and express yourself.

The Fundamentals:

Here are some brief description of the fundamentals of strumming. Underneath each description is a link where you can read a more in depth lesson on each topic, with examples.

Rhythm:

Most people have at the very least a basic understanding of rhythm. Rhythm is essentially timing in music. Rhythms can be simple, or more sophisticated, but all rhythms are based on a steady beat, and an interaction with that beat.
What Is Rhythm?

Right Hand Movement:

Right hand movement is a fundamental part of strumming (I’m assuming for the sake of simplicity that every guitarist is right handed). While on a basic level this is seems obvious (how can you strum without moving your right hand) they way in which you use your right hand also provides a kind of ‘rhythmic platform’ for all rhythms to be expressed.
Strumming And Right Hand Movement

String Selection:

I would call this a secondary fundamental. It’s really something you refine once you really understand the concepts involved with rhythm and right hand movement, but it’s an important part of strumming none the less. String selection refers to which strings you are actually strumming at any given time. For example, you might strum all the strings on the way down, but then only the first few strings on the way up. This is a very basic illustration of string selection. Most guitarists don’t actually think about this when strumming. It becomes a subconscious reflex of expression. However, it is important to be aware of it so that you can experiment with it.
String Selection When Strumming

Dynamics:

Again, this one is more of a secondary fundamental, as it is not as essential as the first two. Still though, it is an important part of making strumming sound expressive and fluid. A basic example of using dynamics in strumming is to play 4 down strums over and over again and accent the first strum in each group of 4. This is a basic example of how dynamics can breath life and expression into a strumming rhythm.
Using Dynamics When Strumming

Percussive Sounds:

This technique is used to give the strumming pattern a percussive feel. It involves producing ‘muted’, percussive sounds while strumming to add life to the strumming pattern.
Strumming With Percussive Sounds

There are of course a few other variables and techniques that can be used when strumming (such as position of right hand etc.) but the above 5 fundamentals cover 99 percent of what strumming is all about.

Quick Links:

Guitar Chords For Beginners
Understanding Bar Chords
What Is Rhythm?
Strumming And Right Hand Movement
String Selection When Strumming
Using Dynamics When Strumming
Strumming With Percussive Sounds

Chord Theory And Construction On The Guitar

Chord theory is a fascinating topic. Understanding what chords are and how they are constructed on the guitar can really open your mind to a new world of possibilities.

To understand Chords, you firstly need a basic understanding of Major Scales. If you are a little unsure, please read the previous post, understanding major scales.

The reason why major scales are so important is becuase it is from that particular scale that chords are constructed.

A major scale is simply 7 notes separated by intervals (tones and semitones):

Root Note (starting note) – Tone – Tone – Semitone – Tone – Tone – Tone – Semitone (starting note again, but up one octave).

So if we were to play a C major scale it would look like this:

C – D – E – F – G – A – B – C (up octave)
If we were to play an A major scale it would look like this:

A – B – C# – D – E – F# – G# – A (up octave)

Any major chord is simply the 1st, 3rd and 5th notes of a major scale. That’s it!

So, from the information above, a C major chord is simply the notes C, E and G (1st, 3rd and 5th) played in unison. An A major chord is simply the notes A, C# and E (1st, 3rd and 5th) played in unison.

In summary, any chord is a specific combination of notes from a major scale. The only tricky thing is that these notes can be altered (raised or lowered). I think this will make sense if we look at a list of some chords and what notes they contain. This is not an exhaustive list but contains most of the standard chords that you will come accross.

TRIADS:

Major (1, 3, 5)

Minor (1, b3, 5)

Diminished (1, b3, b5)

Augmented (1, 3, #5)

7th CHORDS:

Major 7 (1, 3, 5, 7)

Minor 7 (1, b3, 5, b7)

Dominant 7 (1, 3, 5, b7)

Diminished 7 (1, b3, b5, bb7) – yes, it has a double flat!

Half Diminished (1, b3, b5, b7)

Minor Major 7 (1, b3, 5, 7)

Augmented 7 (1, 3, #5, b7)

There are a lot more chords than this but if you can understand what is going on with the above chords then you are well on your way to understanding chord construction. You should notice that most chords have 1, 3 and 5 as a kind of ‘core’. Those notes might be altered (flat 3 or sharp 5 etc.) but they are still based around the original 1 – 3 – 5.

To make sure we understand what is going on, let’s do another example:

The notes in the key of G are (G major scale):

G – A – B – C – D – E – F#

If we wanted to play a G minor 7 chord, we would need 1, flat 3, 5 and flat 7.

1 is G

3 is B, therefor flat 3 is Bb.

5 is D

7 is F#, therefor flat 7 is F (natural)

So the four notes are:

G – Bb – D – F

We have just constructed a G minor 7 chord! Keep in mind that this is all just theoretical at this stage. We have not yet executed any of these chords on guitar, we have just figured out the notes involved. You might be thinking, ok, so C major has 3 notes, C – E – G, but the C major I know uses every string on the guitar, how does that work? The reason why this happens is because when we actually play chords on the guitar, we typically double up on notes.

Let’s look at an open C major chord.

Open C Major Chord

As you can see, we have the notes C, E, G, C, E.

There are 5 strings being played, but the only notes contained are C, E and G (1, 3 and 5). It does not matter that some notes are played twice and others once. All that matters is the 1, 3 and 5 are contained in the chord.

Let’s look at another example. Bb minor 7 chord. This is a root 6 bar chord played on the 6th fret.

Bbm7 Bar Chord

The notes in a Bbm7 chord are Bb – Db – F – Ab (1 – b3 – 5 – b7)

If we look at the notes in this particular shape we have Bb – F – Ab – Db – F – Bb. What this shows is that the notes do not necessarily need to be in a particular order. As long as the 1-b3-5-b7 are in the shape and nothing else, you will be playing a minor 7 chord. The order of notes and choices of double ups etc definately affect the sound and much could be written about the application of this, but for now, just think of it like this: Any two chords with the same name are the same chord, but the voicing of the chord can change the shade of color. So an open A7 chord is the same as a Bar Chord A7 chord but they are slightly different shades of the same color.

A great way to practice chord theory is to analyse chords you already know and then try to figure out and understand the notes involved. This can be a very fascinating experience and it really sharpens your ‘musical IQ’, as you are constantly thinking about the notes you are playing and the theory behind the chord that is involved.

Another great thing to do is to think of a chord and then try to construct that chord yourself. This is kind of the revearse process of analysing a chord you already know but it uses the same skills.

As I said, it is a very fascinating thing to do and can give you a real sense of creativity over the guitar. Both methods require that you have a pretty good knowledge of the fretboard.

It should also be said that this is really just an introduction to chord theory and does not even scratch the surface of why, for example, certain chords work well together in a chord progression etc. We have really only focused fpr now on how to construct chords.

Playing And Understanding Bar Chords

Once you have gained confidence playing open chords, the next thing to tackle in the chord department is Bar Chords. Bar chords are a very powerful and useful tool on the guitar. A bar chord involves ‘barring’ a finger (usually the 1st) so that the one finger is playing multiple strings at once. Because bar chords contain no open notes, they are movable up and down the fretboard. This means that if you learn to play a major shape (for example), you can play it in as many different positions as possible. The hand strength required to play bar chords is much more than for open chords, so at first, it will probably feel very uncomfortable. It is very easy to get discouraged when starting out with bar chords. Try not to expect too much at the start. Just go through the motions of playing the shapes and know that if you practice them every day, you will soon see great progress.

Main Chord Types:

There are 4 main types of bar chords:

Major – Dominant 7 – Minor – Minor 7

Remember, major is always the default chord. It is not necessary to say “A Major”. You can just say “A”. Dominant 7 gets abbreviated to ’7′ (for example, A7). Minor is abbreviated to ‘m’ (for example,  Am) and Minor 7 is abbreviated to ‘m7′ (for example, Am7).

There are also essentially 2 different main ‘groups’ of bar chords. 1 group is played with the root note on the 6th string (E). The other group is played with the root note on the 5th string (A). These are refered to as ‘root 6′ bar chords and ‘root 5′ bar chords. We are going to look at Major, Dominant 7, Minor and Minor 7 shapes for both root 6 and root 5 bar chords. Therefor, we will be looking at 8 shapes in total:

Bar Chords - Root 6 - Major

Root 6 – Major

Bar Chords - Root 6 - Dominant 7

Root 6 – Dominant 7

Bar Chords - Root 6 - Minor

Root 6 – Minor

Bar Chords - Root 6 - Minor 7

Root 6 – Minor 7

Bar Chords - Root 5 - Major

Root 5 – Major

Bar Chords - Root 5 - Dominant 7

Root 5 – Dominant 7

Bar Chords - Root 5 - Minor

Root 5 – Minor

Bar Chords - Root 5 - Minor 7

Root 5 – Minor 7

Knowing Your Root Notes

Remember, all of these shapes can be played anywhere on the neck, so it is important to know what the root notes are for any position. For example, if you play the first shape (root 6 Major) with the bar in the 1st fret, you would be playing an F major chord. If you were to play the exact same shape but on the 7th fret, you would now be playing a B major chord. Obviously knowing the notes along the neck for the 6th string and 5th string is essential for understanding this.

The following tables show which note corresponds to each fret on the 6th and 5th strings:

Notes On The 6th String

Notes On The 6th String

Notes On The 5th String

Notes On The 5th String

It should be pointed out that I haven’t included sharps and flats in this table, that’s because it is easier to learn the natural notes and then figure out where the sharps and flats are. For example, if G is on the 3rd fret of the 6th string, G# will be on the 4th fret. If D is on the 5th fret of the 5th string, Db is on the 4th fret. And so on. It’s quite simple, # (sharp) moves up a fret and b (flat) moves down a fret.

With the information in these tables, you can play any of the above shapes in all 12 keys. Just to clarify, let’s do another example. If we wanted to play B7, we would have 2 options. B7 in the form of a root 6 chord, or B7 in the form of a root 5 chord. If we were to play a root 6 chord, we would look at the notes on the 6th string and see that on the 6th string, the note B occurs on the 7th fret. Therefor, to play B7 as a root 6 chord, we would play the Dominant 7 shape (2nd chord in the list) and play it on the 7th fret. If we wanted to play B7 as a root 5 chord, we would look at the table for the 5th string and see that B occurs on the 2nd fret of the 5th string. Therefor, we would play the other Dominant 7 shape (6th chord in the list) on the 2nd fret.

As you can see, there are a lot of chords available to us now. Just within the first 12 frets, you have 8 different shapes that can be played in 12 different positions. That’s 96 chords!

Memorizing the shapes and positions is actually easier than it may seem at first. You should try to memorize the 8 shapes as quickly as possible and get used to playing them up and down the neck. To start with, you don’t need to be overly concerned with what key you are in or the root note you are playing. Just get used to the shapes until they start sounding clear enough to potentially use in a song. Once you are starting to get the hang of the shapes, that’s when you will want to get familiar with the positions. To do this, all you really need to do is learn simple songs and use bar chords instead of open chords. Practice playing a 3 chord song and use bar chords for each of the 3 chords. After you have played a few songs in this way, you will find that you are remembering where all of the root notes occur without having to refer to the tables.

If you want to speed up the memorization process, read the following post, how to know every note on the fretboard.

Guitar Chords For Beginners

Learning Chords all over the neck of the guitar is an endless pursuit and can take a life time to master. There is almost an infinite amount of voicings, combinations etc that can be constructed to produce chords.

Luckily, if you are starting out, you can get by with only  a few chords. Of course the time will come when you will no doubt want to branch out and learn some more, but I would say that 90 percent of songs in the mainstream use about 10 percent of chords available, which means that you should focus on learning the main ones to start with.

A chord is simply 3 or more notes played in unison. We achieve this on the guitar typically by gripping a shape with our left hand and strumming with our right hand.

Chords can be loosely divided into 2 categories:

Movable chords and open chords.

Movable chords are chords that contain no open string and can therefor be moved up and down the neck. For now, we will focus on open chords. Open chords are chords that contain at least one open string and are generally easier to get the hang of.

16 Main Open Chords

There are only 16 open chords that I would consider to be the ‘main’ ones. These are basically all the minor, major and dominant 7 chords that can be played in the open position. Don’t worry too much about what those names actually mean. The theory behind it can be learned pretty easily down the track.

Here they are. Just to clarify, there are 3 types of chords in the list, Major, Minor and Dominant 7.

Guitarists generally like to abbreviate things as much as possible. Major is the default chord. Therefor, if you were to say, “I am playing a C chord”, you are actually saying, “I am playing a C Major chord” and vice versa. Minor usually gets abbreviated to a lower case m, so you will often see (for example) D minor written as Dm. Dominant 7 gets abbreviated to 7, so you will often see (for example) F Dominant 7 written as F7. With that in mind, here are the main 16 open chords:

A Major Open Chord

A Major

A Minor Open Chord

A Minor

A Dominant 7 Open Chord

A7

B Dominant 7 Open Chord

B7

C Major Open Chord

C Major

C Dominant 7 Open Chord

C7

D Major Open Chord

D Major

D Minor Open Chord

D Minor

D Dominant 7 Open Chord

D7

E Major Open Chord

E Major

E Minor Open Chord

E Minor

E Dominant 7 Open Chord

E7

F Major Open Chord

F Major

F Dominant 7 Open Chord

F7

G Major Open Chord

G Major

G Dominant 7 Open Chord

G7

It should be pointed out that technically F and F7 do not have any open strings in them. I have included them in the list because they are played in the first few frets and F major is a very common chord. F is probably the hardest ‘open chord’ to get used to for beginners. It should also be pointed out that this is by no means an official list and there are variations that are possible with a lot of the above chords. There are also other types of chords that aren’t included in this list because they are not as common but are technically open chords. If we included minor 7 chords or suspended 4 chords (for example) the list would be much larger.

There are literally thousands of great songs that can be played with just 3 chords. If you can get comfortable with the above 16, you will obviously have a lot of songs that you can potentially play. The hardest thing to master when starting out however, is feeling comfortable with each shape and then being able to move from one chord to another, seamlessly. This does take time and happens at different speeds for different people. So be patient and try to get the finger muscles working every day. The best approach is to take only a few of the chords and practice those. For example, learn A, D and E and practice moving between them. Of course, there’s no harm in having a go at the others and it might serve only as a good introduction to them once you decide to start practicing the remaining shapes, but try to get a bit of momentum and confidence with just a few chords before you launch seriously into the rest.

Once you feel comfortable playing a few of these basic chords, you will need to know how use them while strumming. Read the following post, how to strum on the guitar for beginners for a thorough guide to strumming.

© 2011 - Online Guitar Books
Wordpress Themes
Scroll to Top